A colorful painting captured by Steve Johnson
Is this a piece of art or just a set of ugly stains? Most of the time, a human would answer this type of question correctly. Computers… not so much (they’re basically only slightly more complicated than washing machines.) The answer? Artificial Intelligence!
Right, but what is Artificial Intelligence?
Well, it depends: in general, Artificial intelligence (AI) is intelligence (or a set of behaviors that we deem intelligent) demonstrated by machines, as opposed to the natural intelligence displayed by animals and humans. Artificial general intelligence (AGI) is the ability of an intelligent agent to understand or learn any intellectual task that a human being can. Capable of tackling complex issues without the need for pre-training. Researchers from around the world have been working on developing the latter for decades now, but even though recent AI advancements (like Chat GPT) can be really impressive, AGI is still a loooong way ahead of us.
Learn More
Interested in speeding up your data labeling? Make sure to check out our webinar on how to slash your data labeling time in half using ChatGPT! Access your on-demand session now.

OK, so what is within our reach? We can try tackling solvable problems of a practical nature using methods and models borrowed from statistics. Asleep yet? In essence, this means problems like:
- Based on an X-ray, how to automatically recognize if a tumor is benign or malicious?
- What’s the most optimal spot on the map to open a new Starbucks?
- How to spot production defects without engaging humans?
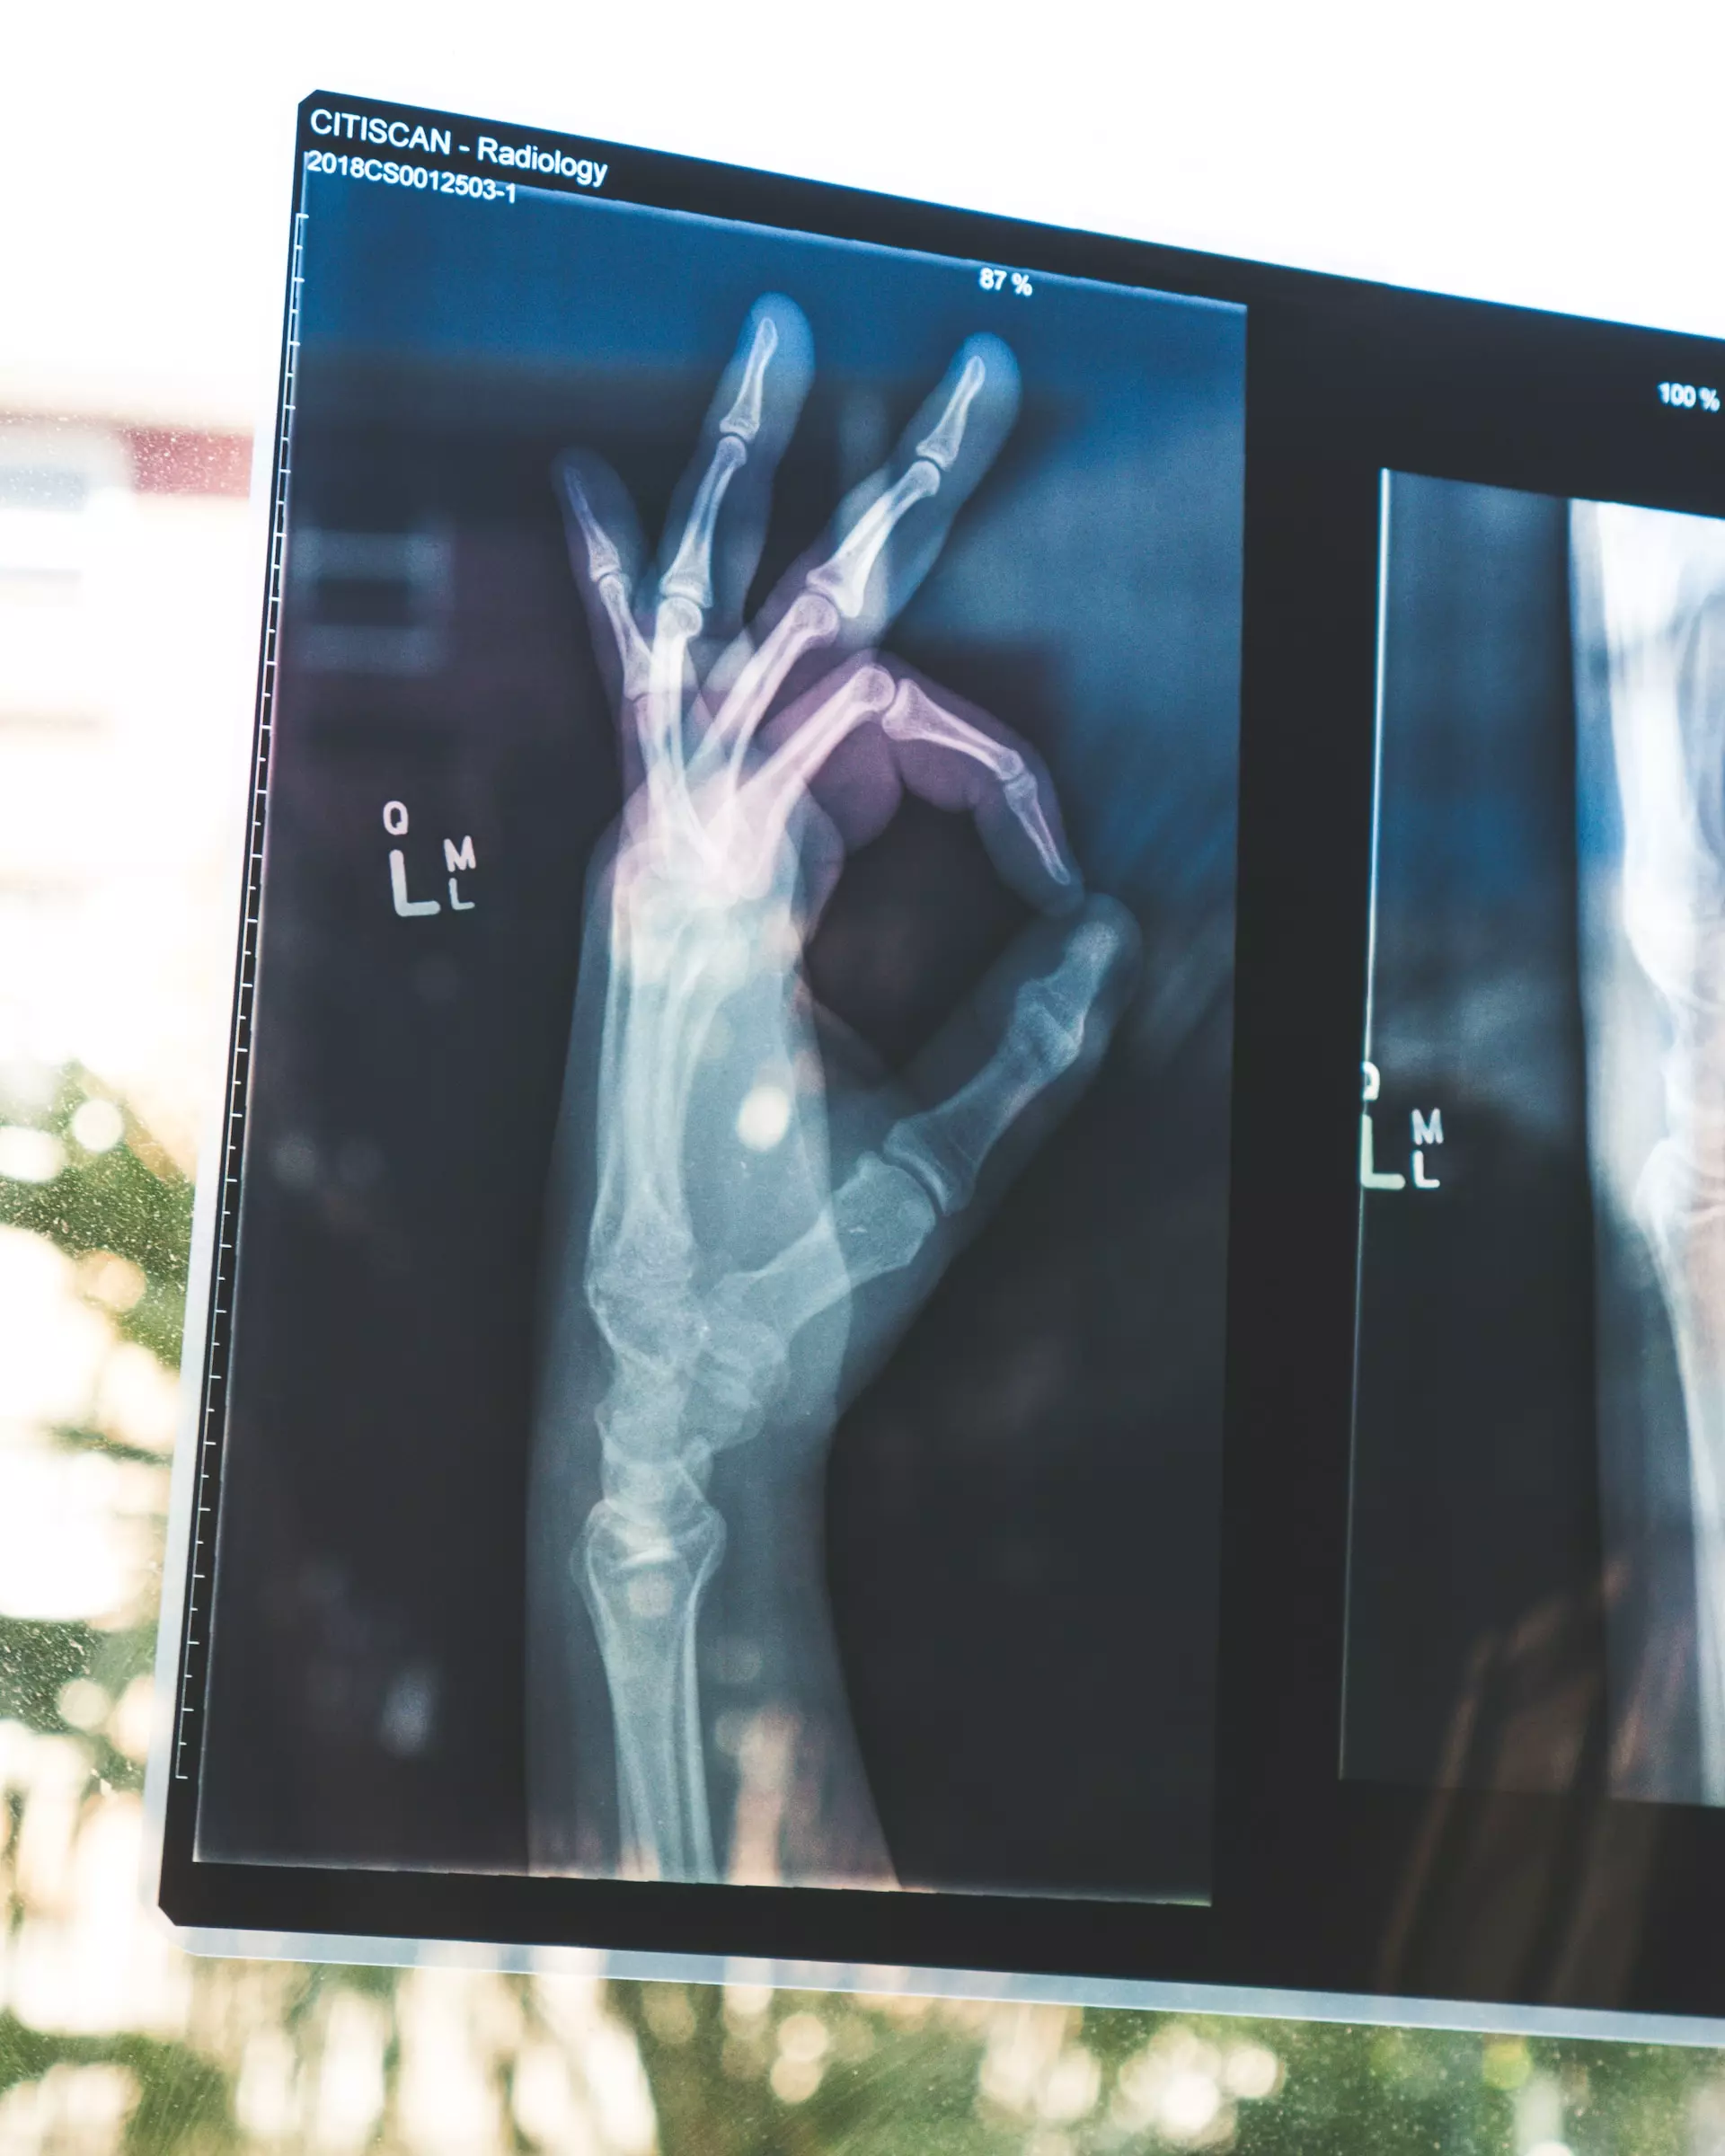
Medical Imagery of a hand
Before we get to do all that, though, we first need to train the machine properly. Remember: the computer you’re dealing with did not grow up in the same neighborhood. It didn’t socialize the way you did. As a result, it won’t automatically be able to tell the difference between a horse and a chicken. To make this possible, you’ll need two things: data and a model.
If you cut out all the technical mumbo-jumbo, a model is essentially a virtual stencil that a computer builds for itself based on the data that you show to it. As a result, a machine learning model will be able to find patterns in a previously unseen dataset. Again, in real terms this means that after you’ve shown it 100 pictures of chickens, it should recognize a chicken in a picture it’s never before “seen”.
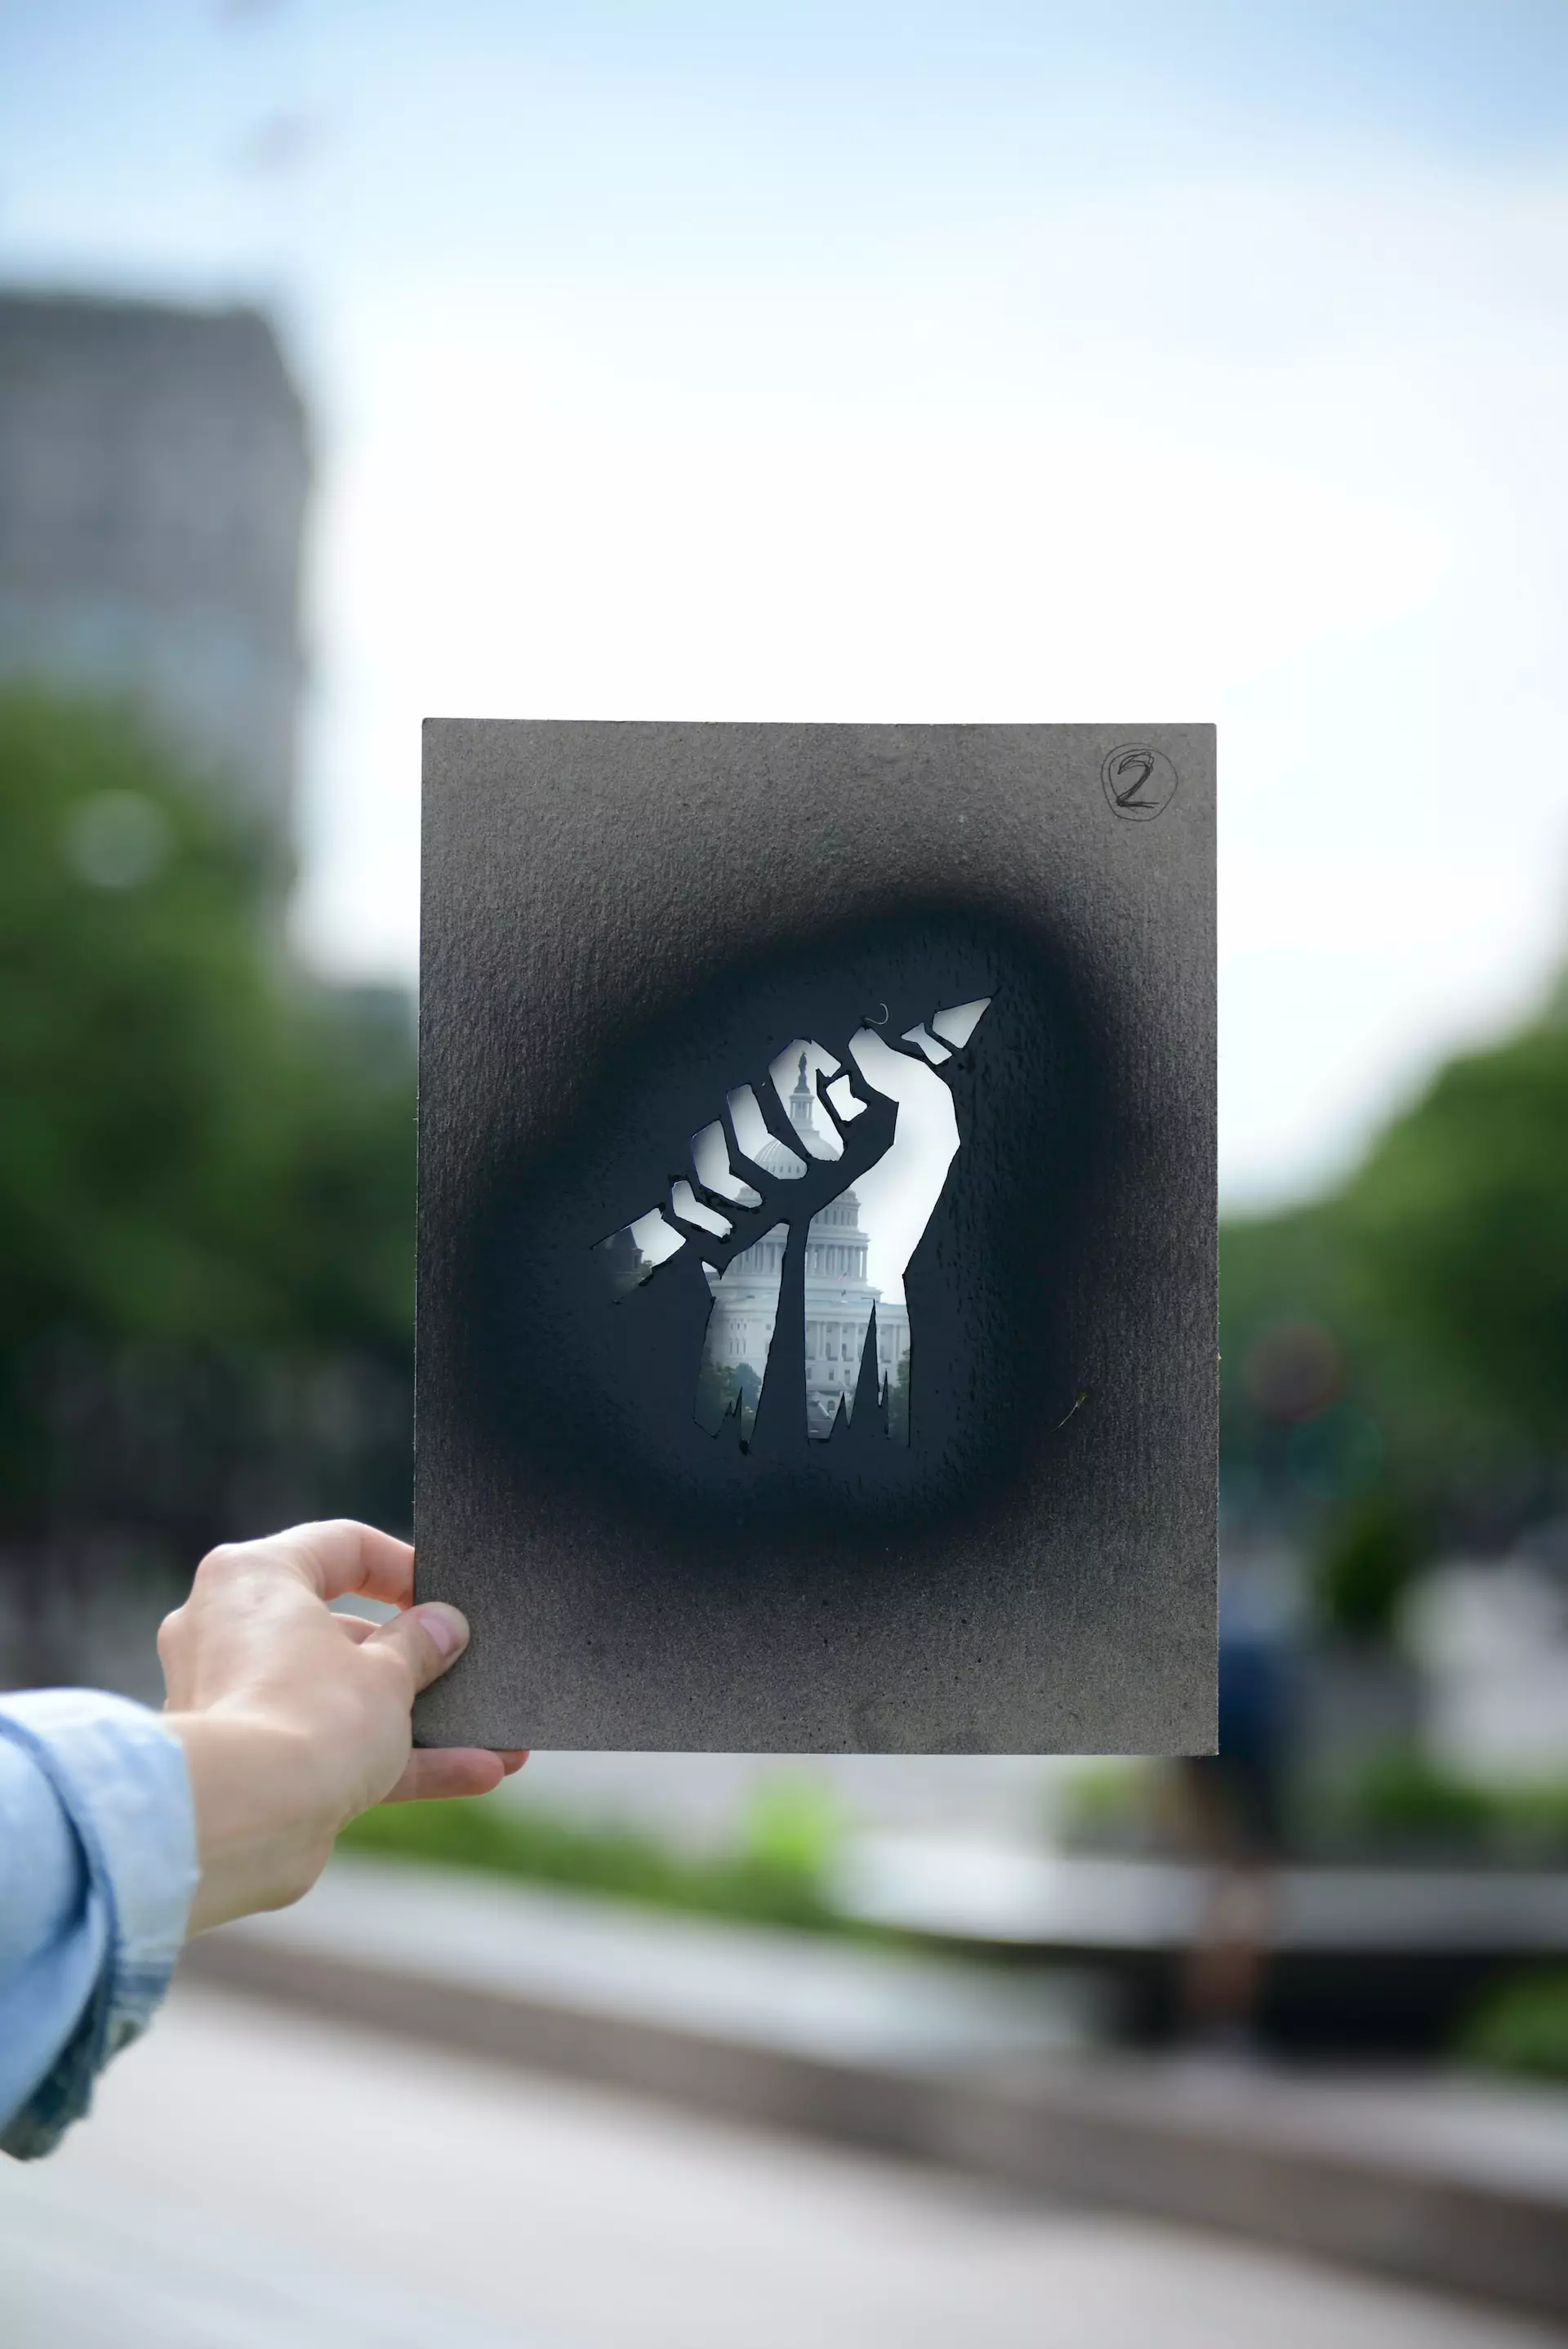
A person holds a stencil
If you want to train your AI model, there are two main teaching methods: Unsupervised learning and Supervised learning.
In unsupervised learning, you throw a bunch of data at your model, tell it what portion of the data is the answer you’ll be looking for, and then watch it try to figure out the patterns in the data itself. In supervised learning, you ask a group of real-life people to tag the data, then feed the model with the tagged (a.k.a. labeled) data so that all that a model has to do is try to extrapolate on these examples.
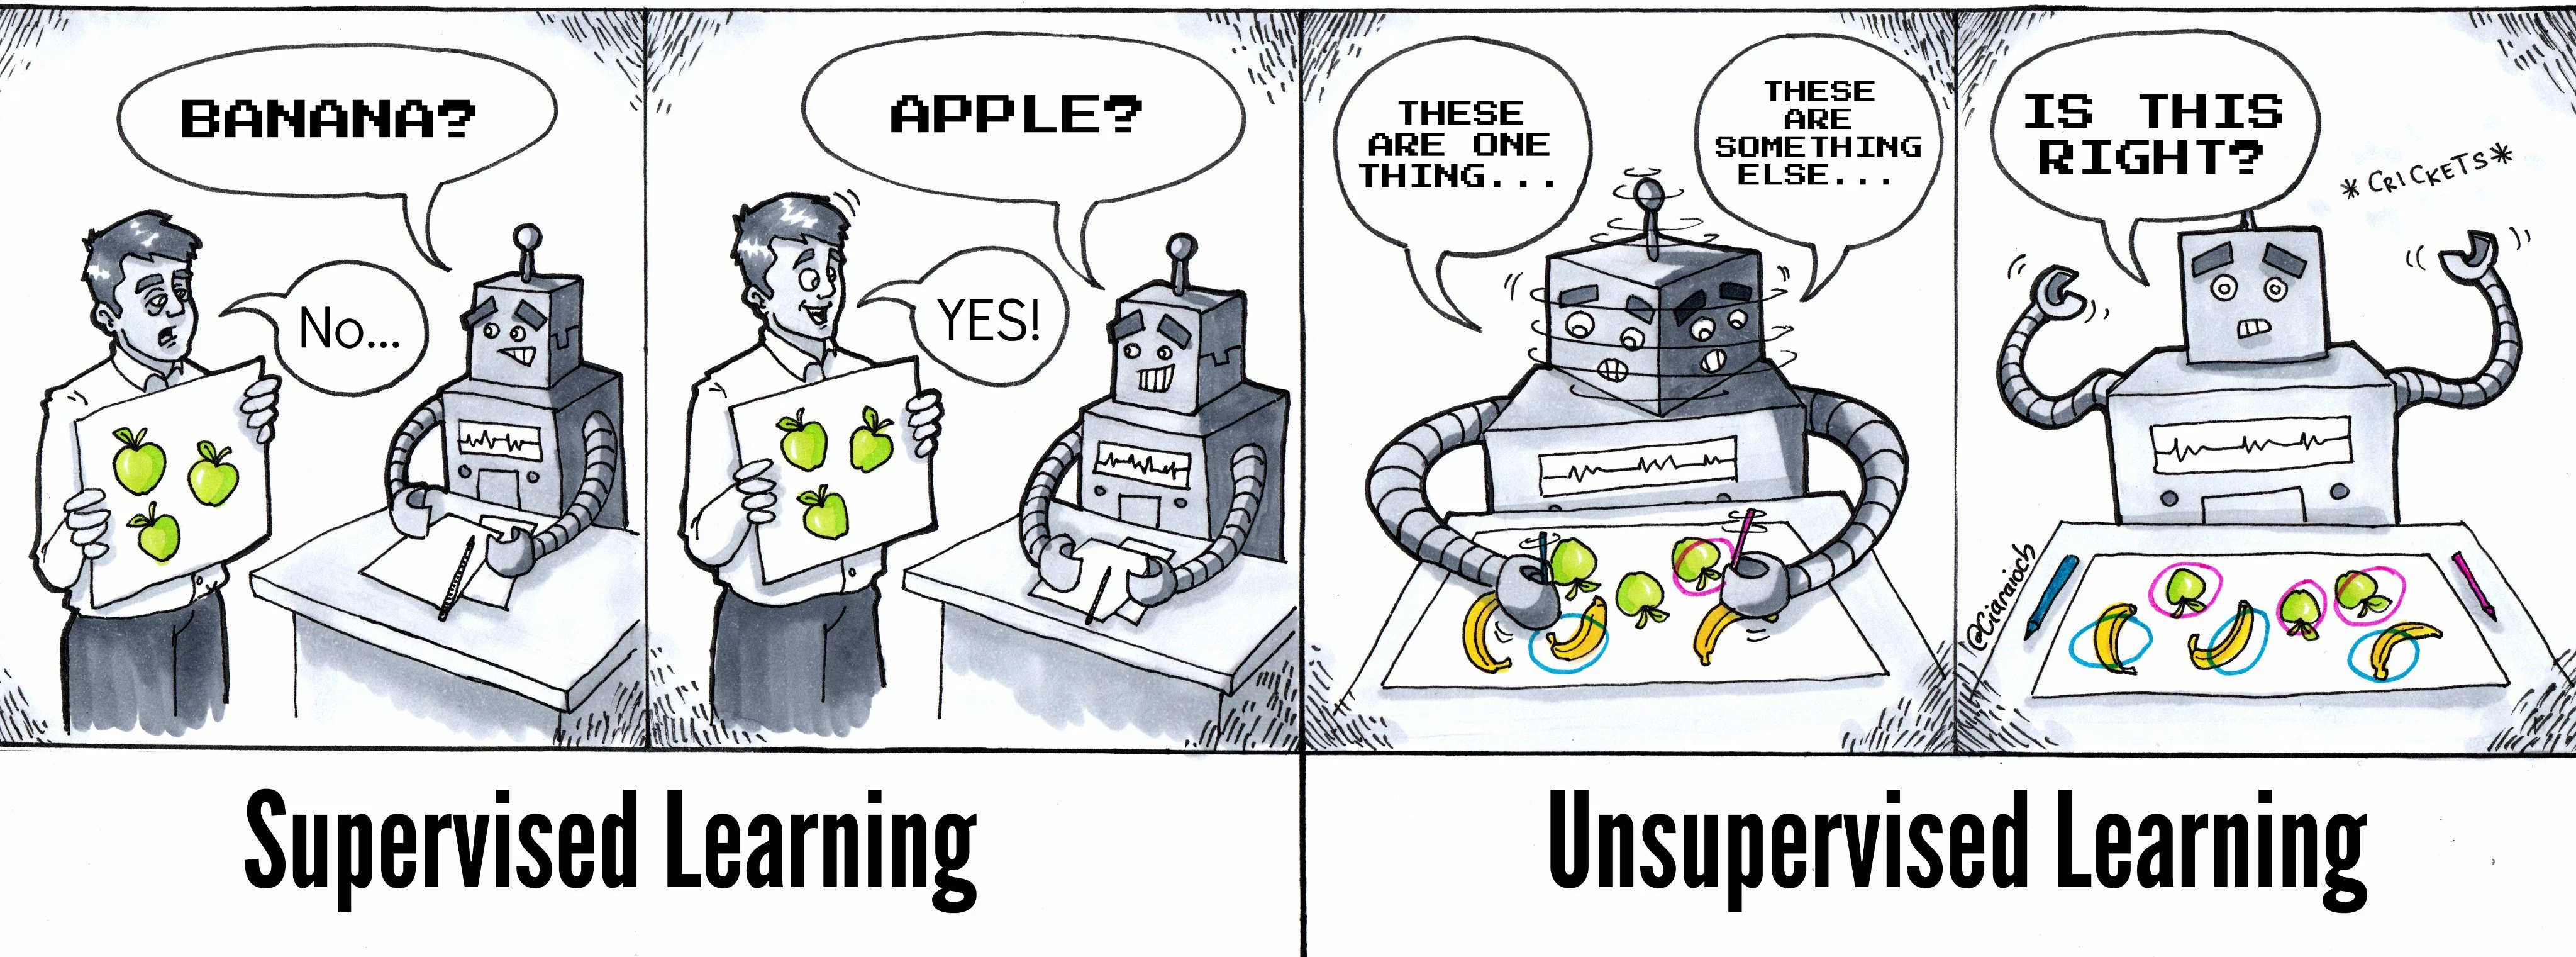
Supervised Learning vs. Unsupervised Learning comic
A good example of unsupervised learning is how most human beings learn the laws of physics– learning how gravitation works may at times be painful–or our own language. If you want to learn a foreign language or how to play a guitar, though, most of the time, you’ll have to use some form of supervised learning.
In our tutorial, we’ll focus on a simple problem from the domain of computer vision: automatic extraction, analysis, and understanding of useful information from a single image or a sequence of images. So we’ll basically ask a computer to look at our data and draw conclusions.
A common approach to computer vision is through deep learning techniques, where multiple layers of networks built of artificial neurons progressively extract higher-level features from the raw input. To explain how it works, let’s use an example: in image processing, lower layers may identify edges, while higher layers may identify the concepts relevant to a human, such as digits or letters, or faces. The final result is based on the interactions of outputs from all the layers.
In the example picture, computer vision first scans an MRI, then various layers of artificial neurons process it from various “angles,” and finally, the deep learning network generates one of the possible outputs.
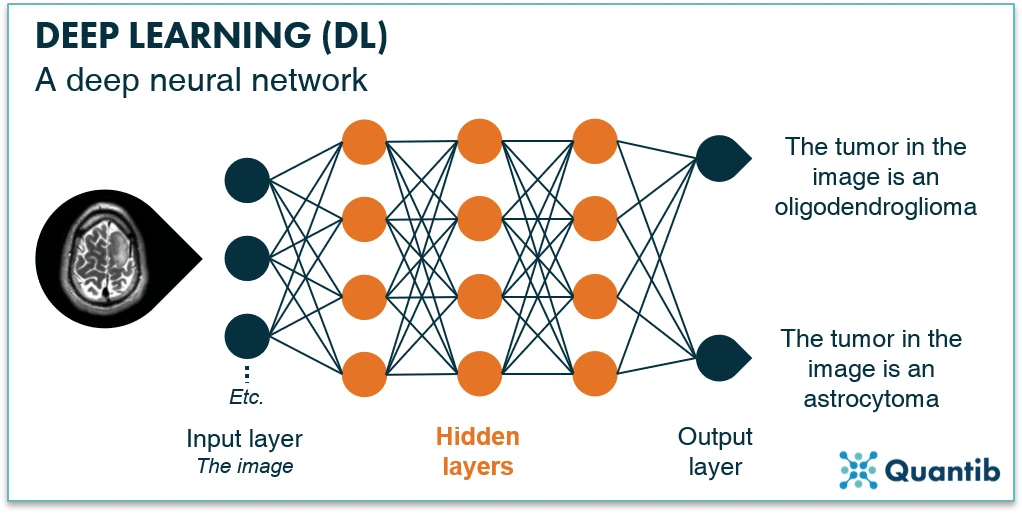
Neural Network in Deep Learning
Let's recap
Artificial intelligence is the ability of a machine to imitate intelligent human behavior.
Machine learning is an application of artificial intelligence that allows a system to learn and improve from experience automatically.
Deep learning is an application of machine learning that uses complex algorithms and deep neural networks to train a machine learning model.
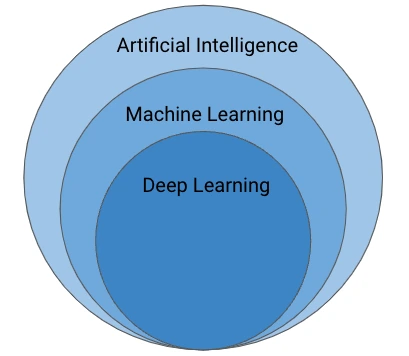
Different Artificial Intelligence layers
Model Training Process
Let’s say you have 100 pictures of chickens. You’ve correctly labeled them and want to train a model to recognize chickens. What you want to do is: take roughly 70% of this dataset and use it to train a model (training set). The model sees the images and your labels and tries to figure out patterns (builds the virtual “stencil”). Then, you take the remaining 30% of pictures (validation set), remove the labels, ask the model to recognize what’s in the pictures, and then compare the results with your labels. This is the first test of your model to evaluate its quality. Finally, your test set is the images that have never been labeled, and your model has never before been “seen”. This means a real-life test for your new model.
Model Training Caveats
Many things can go wrong when training a model. Here, we’ll focus on two that can directly impact our project: underfitting and overfitting. An ML model is underfitting when it is too simple and doesn’t match the complexity of your real-life data. In short: it performs well on training data but poorly on testing data. If underfit, our computer vision model would be able to spot all the chickens in the training set but would struggle when presented with any other picture, like this one, for example:
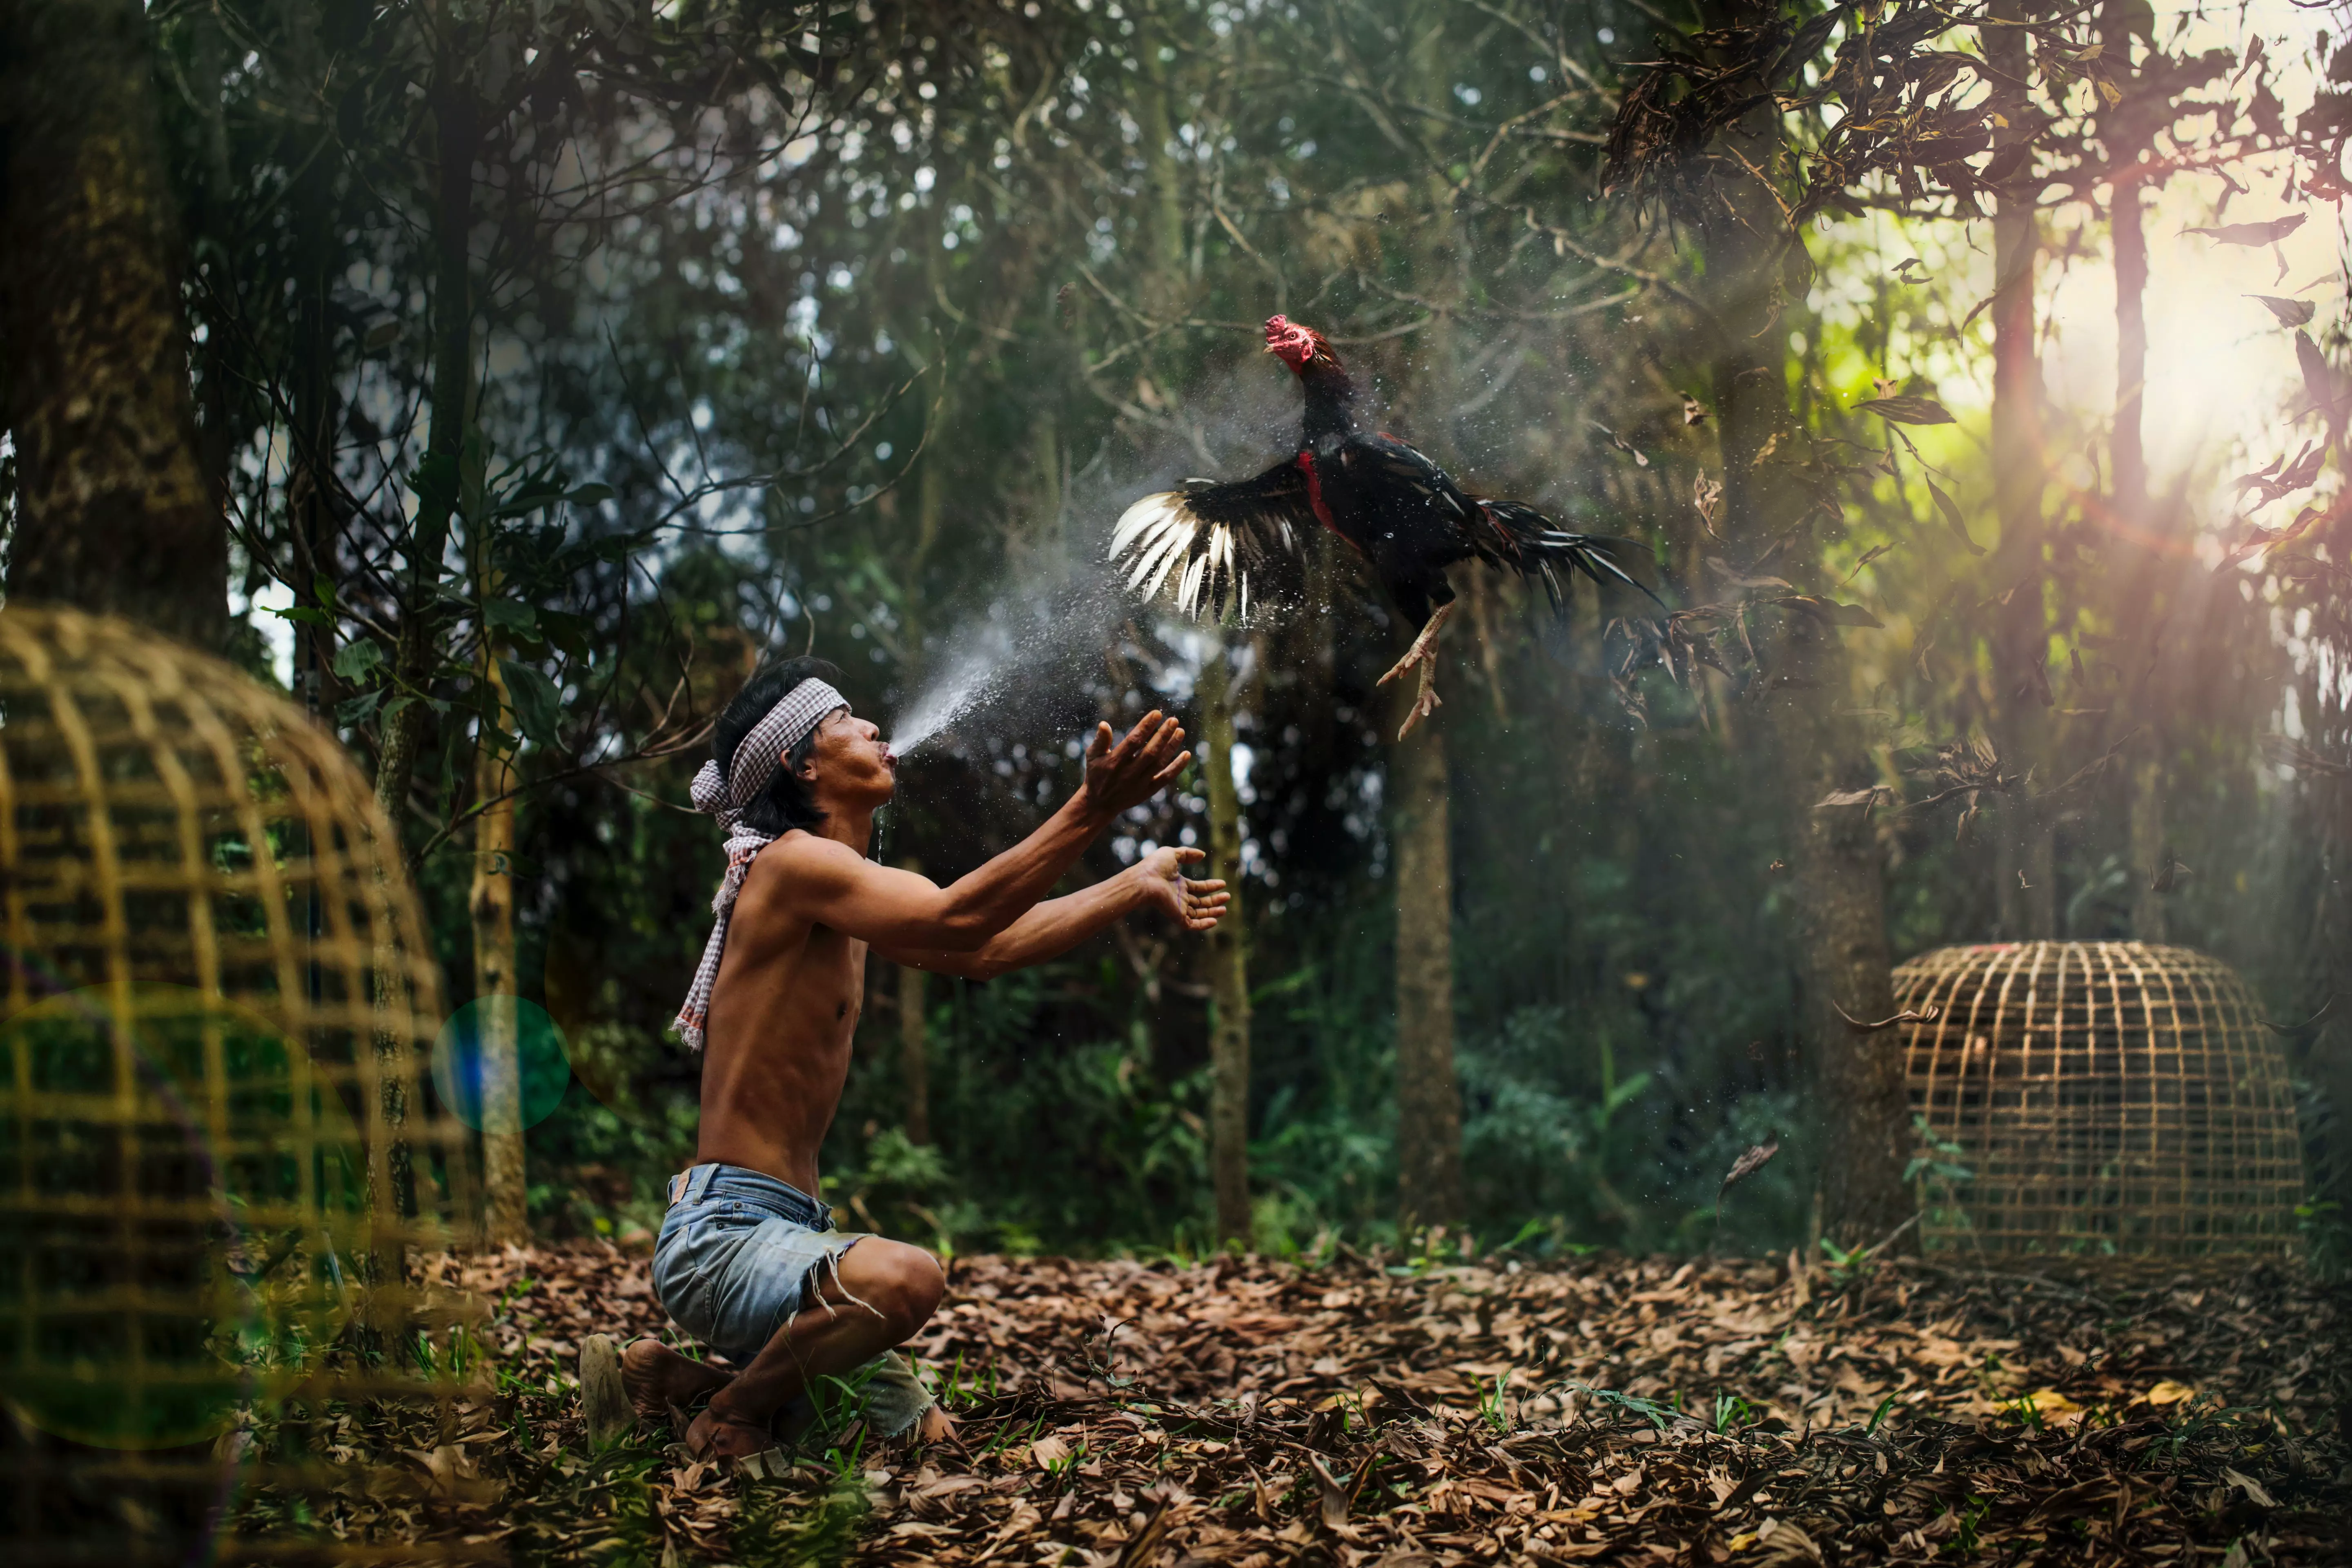
A chicken is photographed in an unusual setting
We speak of overfitting when the model is too complex compared to your real-life data. It does not categorize the data correctly because of too many details and noise provided in the training phase. As a result, the model cannot generalize on new data and gives different predictions for similar inputs. Our overfit model would see two distinctly different object categories here:
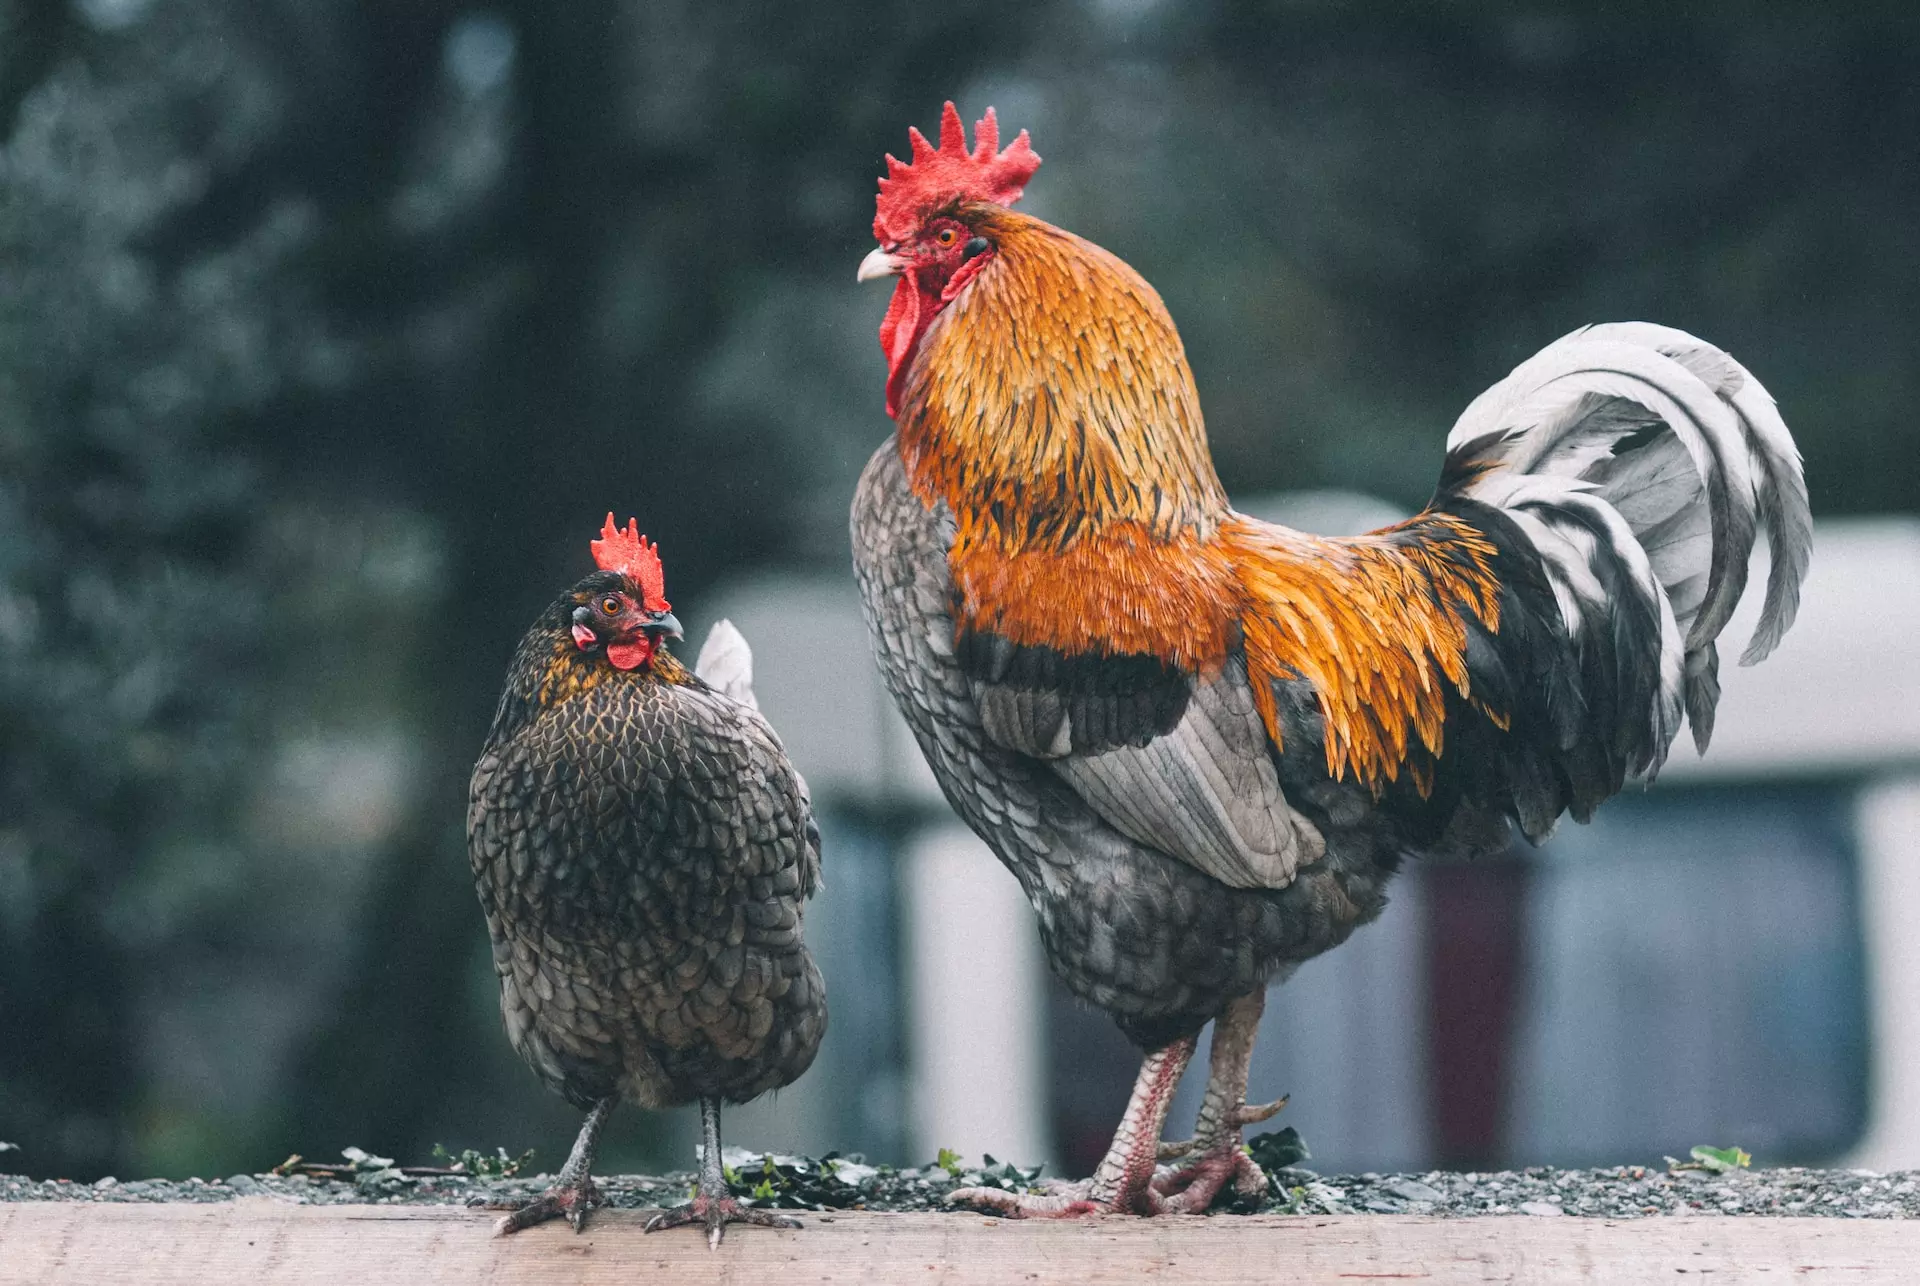
Two chickens walking
Show me How It Works
We promised to show you how to train a machine-learning model using data prepared in an actual state-of-the-art labeling tool. And here’s where Kili Technology’s app comes into play. In a nutshell, Kili Technology's app will help you prepare the training data quickly, reliably, and with quality in mind.
Why is this important? Well, badly-prepared data gives bad, unreliable, messy results. Bad data means wasted time and effort and, eventually, unpleasant conversations with your CFO. Well-prepared data, on the other hand, smells of huge savings, happy customers, and fat bonuses for everyone involved in the project. Worth the shot, isn’t it?
Our aim is to label a bunch of pictures and train a model to recognize chickens in all sorts of contexts. But before you set off to label anything, you need to have stuff that you want to label. For real-world applications, we recommend going to places like Kaggle or any other website that offers free, diverse datasets and then downloading one. If you’re more adventurous, you can also scour the Internet looking for pictures of chickens, but if you want quality results, you’ll need to make some extra adjustments to your dataset.
Since we’re just playing around here, there’s no need to over-invest: simply download 30 random pictures of chickens from the Internet. Just make sure that the resulting dataset is fairly diverse: with roosters, hens, chicks, different camera angles, etc. This will help our model generalize.
First, we need to create a Kili Technology project. To do that, open https://cloud.kili-technology.com and (if you haven’t done it before) sign up to Kili Technology. You may need to set up your own organization, but the process is actually less scary than it sounds.
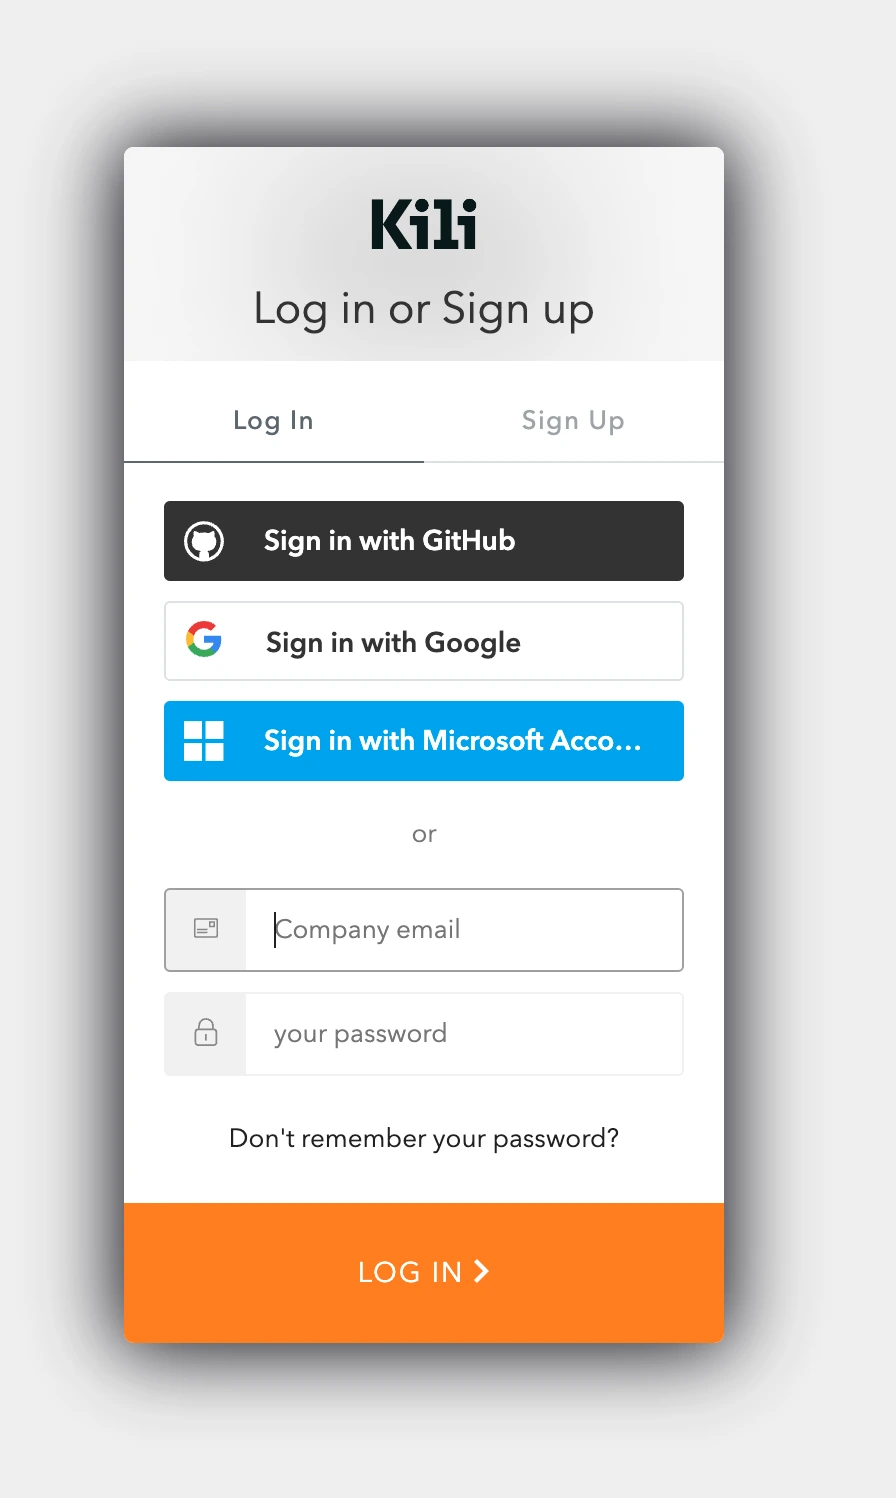
Kili Technology's login screen
When done, you’ll see the Kili Technology main page. From there, click on Create Project.
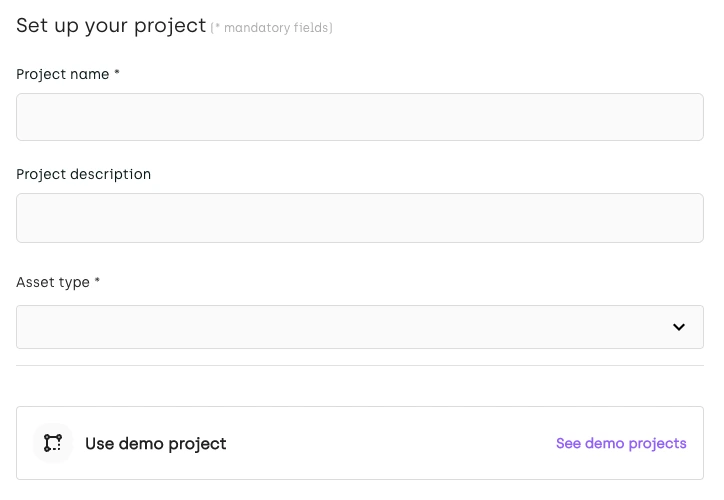
Set up your project using Kili'Technology
For project name, type “Chickens”. Then select “Image” as the asset type.
Now, upload pictures 1 through 28. Later we’ll use them as our training and validation sets. You can select them all simultaneously and use the Drag & drop feature. For simplicity, we recommend that you convert them to .jpg files and use the <number>.jpg schema to name them. You can use other file types and file names, but you’ll have to adjust some of the Python code used to train the machine-learning model.
Uploading assets to Kili Technology platform
In the next stage, you’ll need to add labeling jobs. In Kili Technology, jobs are labeling tasks that are associated with specific tools or input types.
For example, each one of these can be considered a Kili Technology labeling job:
- a classification task with a multi-choice dropdown input type ;
- an object detection task with the polygon tool :
- a named entities recognition task.
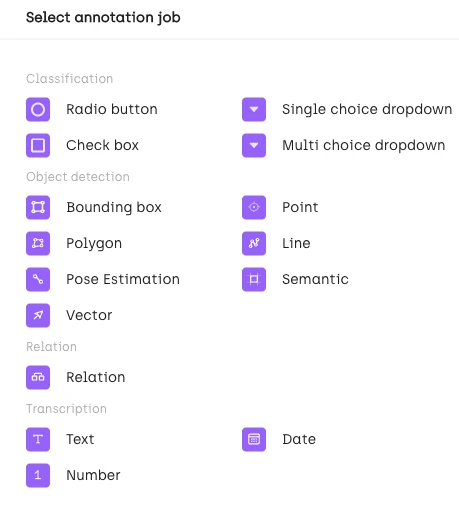
For our purposes, we’ll need an object detection job that uses a bounding box tool.
Different annotation jobs available on Kili Technology platform
In the job itself, we’ll just need to set up one category: “chickens”:
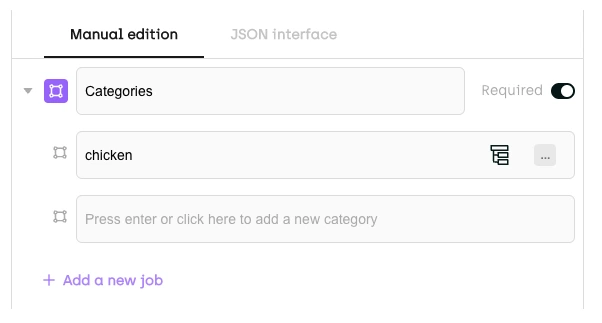
Manual edition
Leave the quality settings unchanged and click Finish. This will create your new Kili Technology project. Simple, isn’t it?
You should now see your new project queue. Doesn’t look like much, but we’re looking for efficiency and quality here, not bells and whistles:
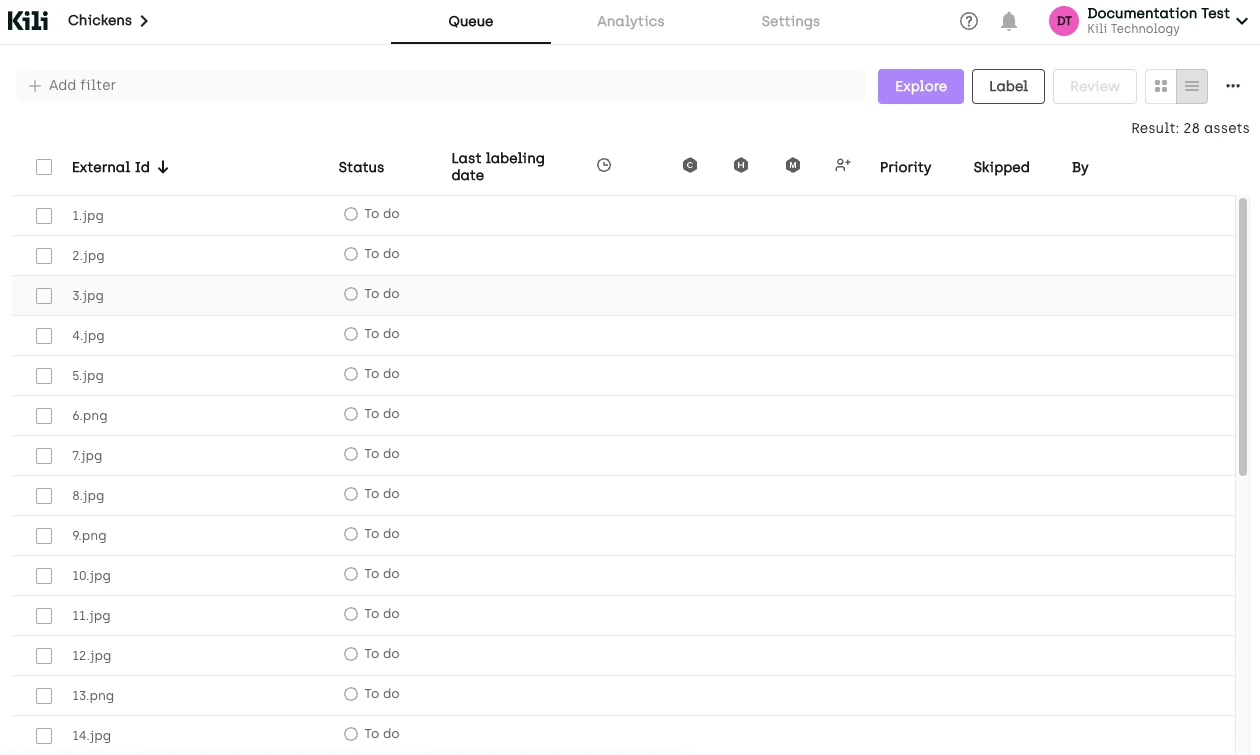
Pictures waiting in queue
We’ll be using a tool known as a Bounding Box (a.k.a. BBox). A BBox is the smallest rectangle that you can draw over an item that interests you, and that contains your object. You don’t have to focus on drawing the exact shape. A rectangular box is perfectly ok.
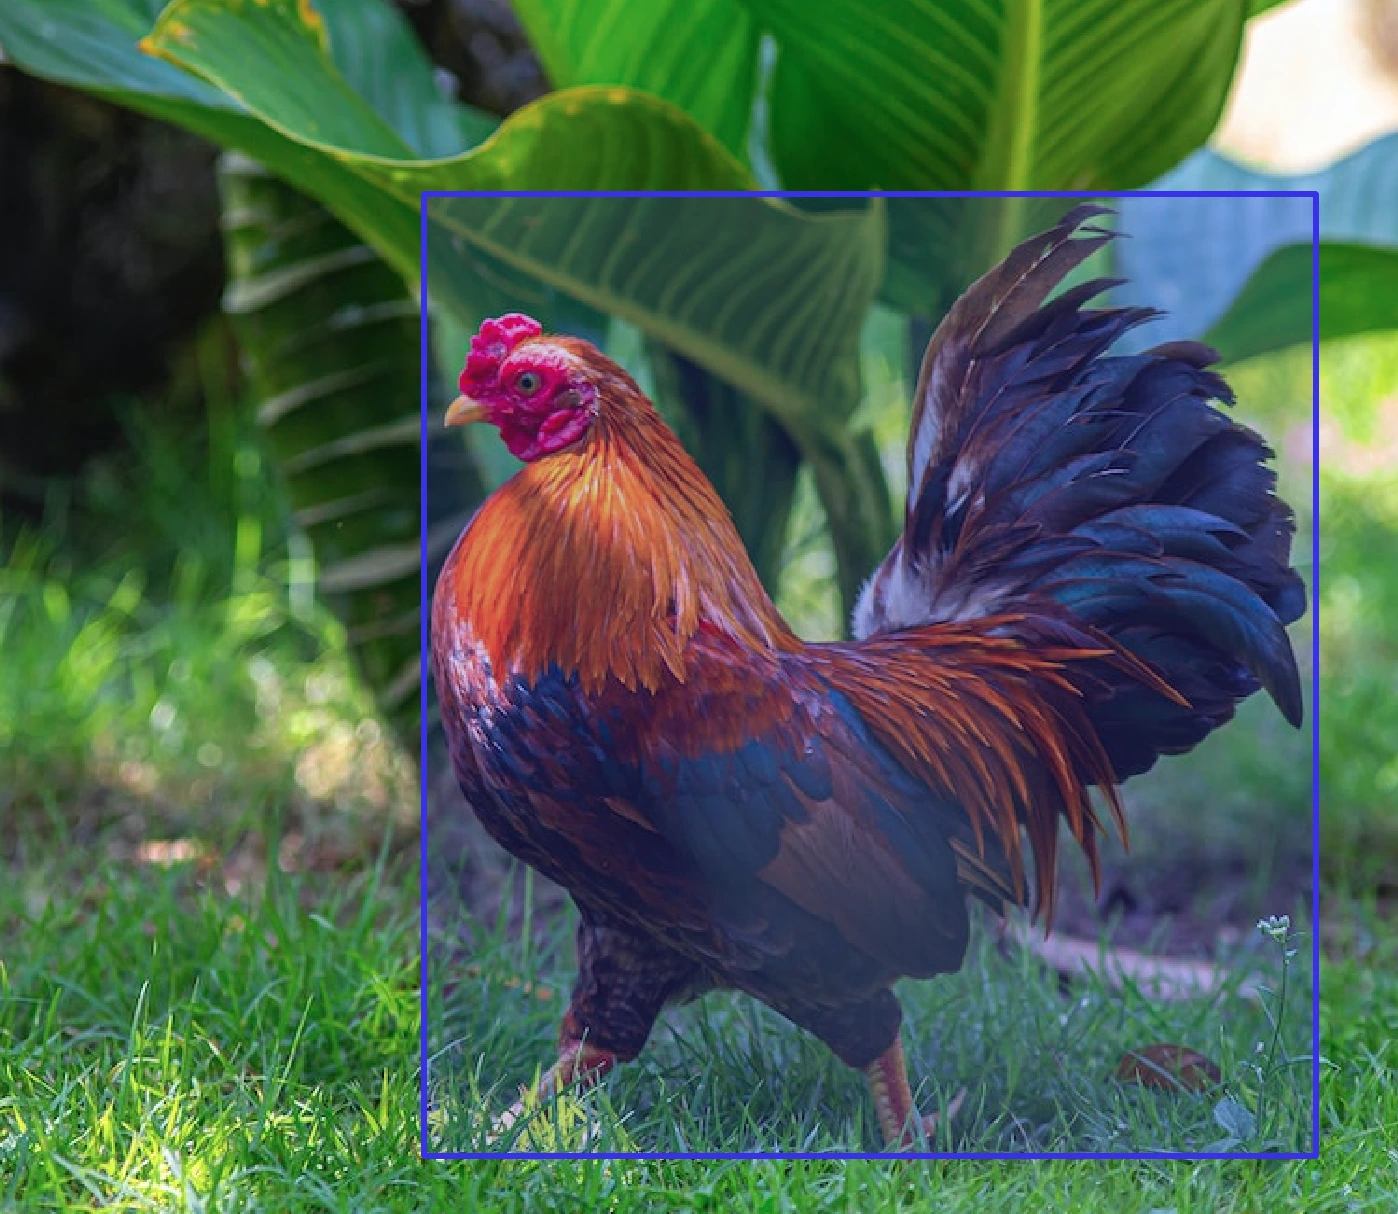
Chicken Labeling
Let’s Label Some Chickens!
Open the first asset visible in the labeling queue, use the menu on the right-hand side to select the Bbox tool, and start labeling:
Example of labeling chicken on Kili Technology platform
When done with your asset, simply click Submit.
If your bounding box is too small or too big, simply press Esc and adjust the size:
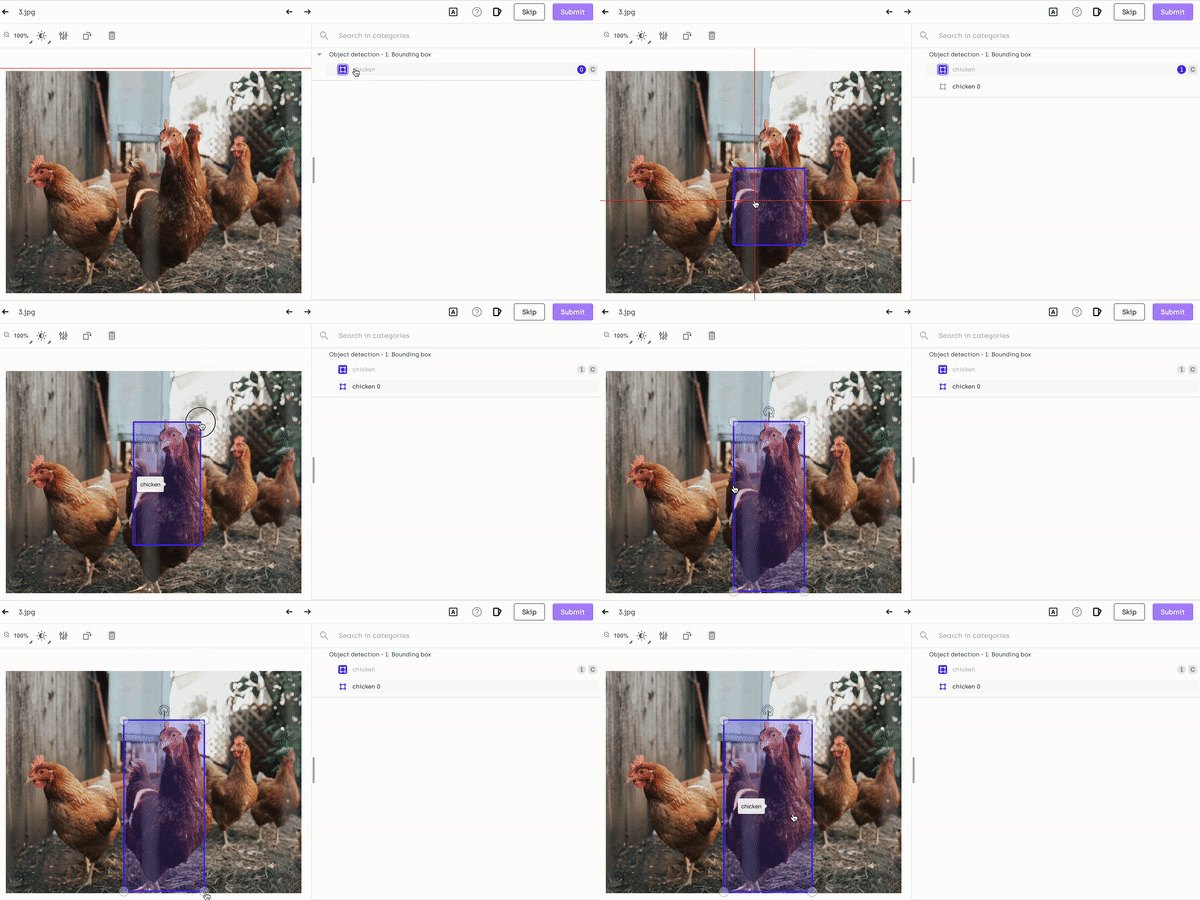
Resizing chicken labeling on Kili Technology platform
When done with all the assets, select all the assets from the queue and then select Export.
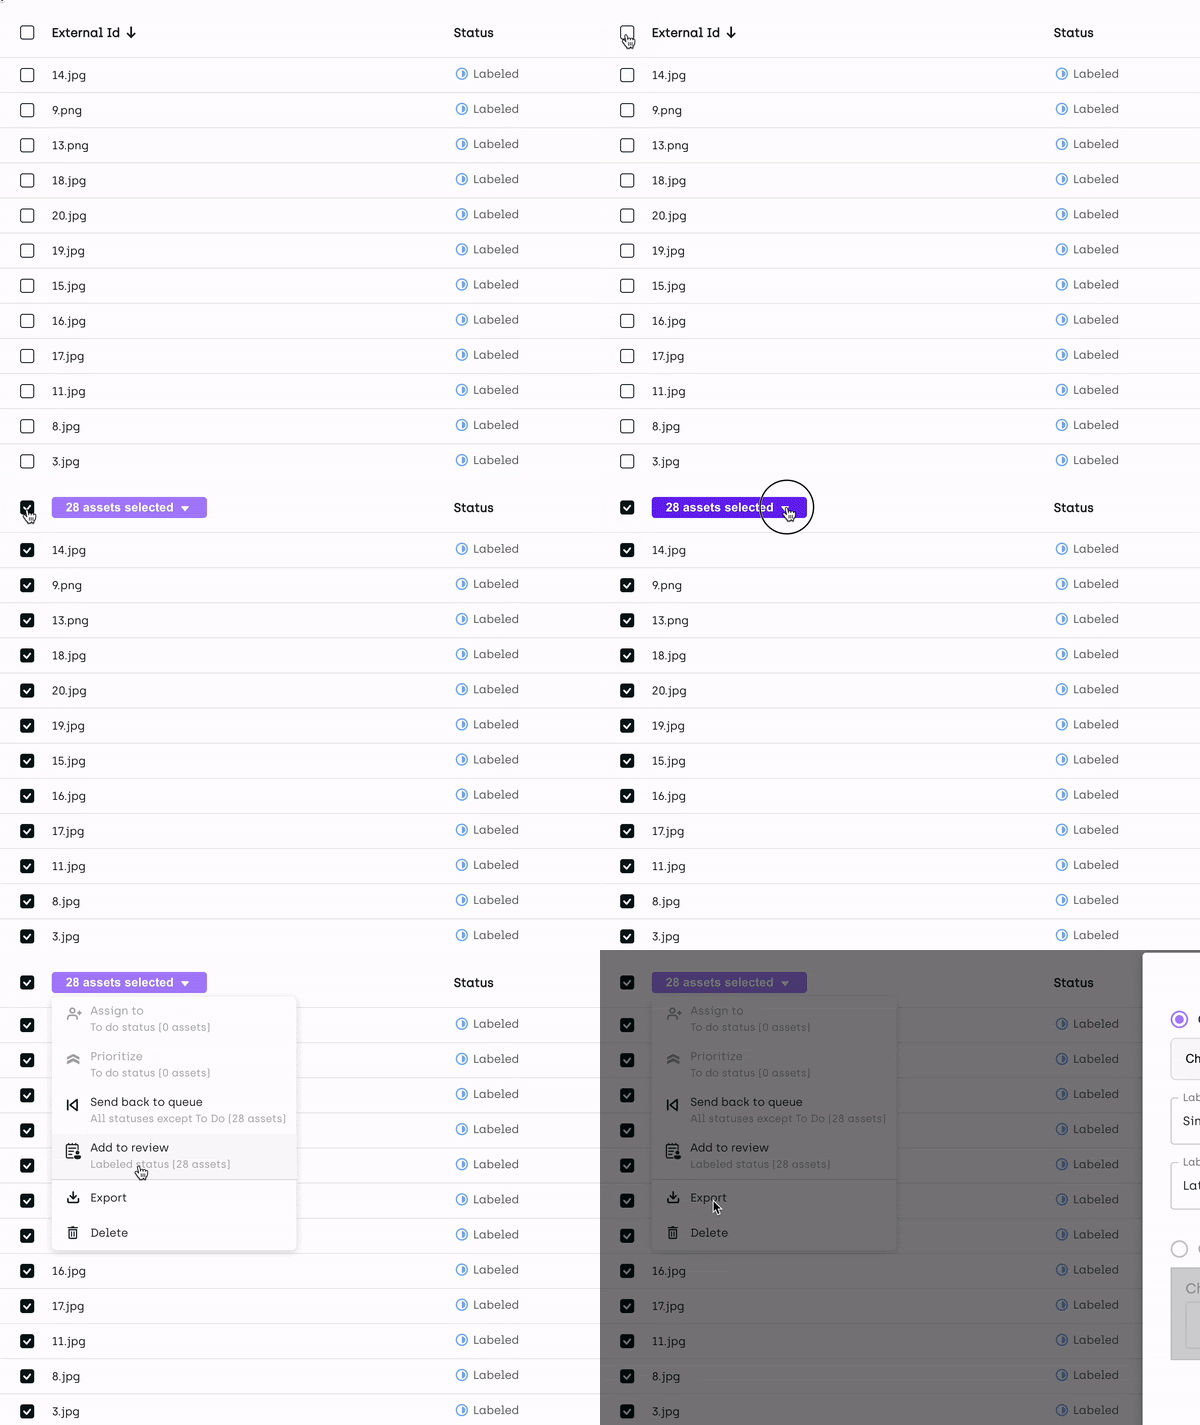
Export multiple images from Kili Technology platform
Set your export options exactly as you see in this picture:
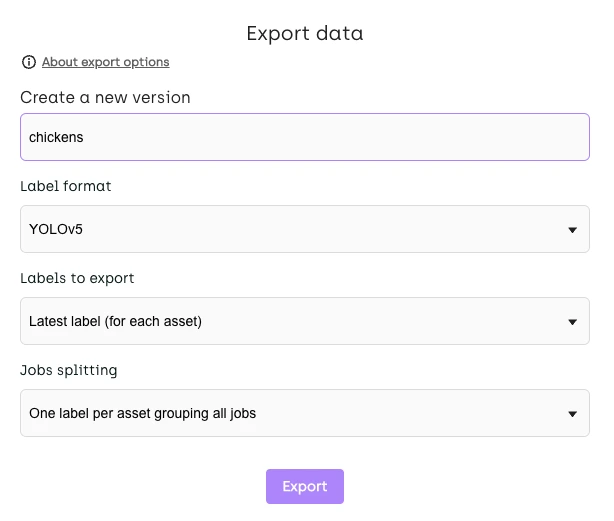
Export data from Kili Technology platform
In Kili Technology UI, click on the bell icon to check export progress:

Exporting data queue on Kili Technology platform
When done, download the file (click on the downward-facing arrow icon):

Exporting data performed on Kili Technology platform
You may have to reload your page to see the information about the status of your export.
When you download the exported file, you’re officially done working with Kili. Note that there are a ton of other things you can do in this app. There are various workflow options, automation opportunities, and a ton of other cool features to fiddle around with, but that’s outside of our scope today.
Let’s Train A Model
Find the exported file on your computer’s hard drive, and change its name to chickens.zip. Make sure all letters are lowercase!
When done, open this Google Collab notebook:
https://colab.research.google.com/drive/11DYvjSgQI79XvUOGgvEGGynKXyhWRdX-?usp=sharing
Don’t panic just yet. It may look complex, but in reality, using it is dead simple.
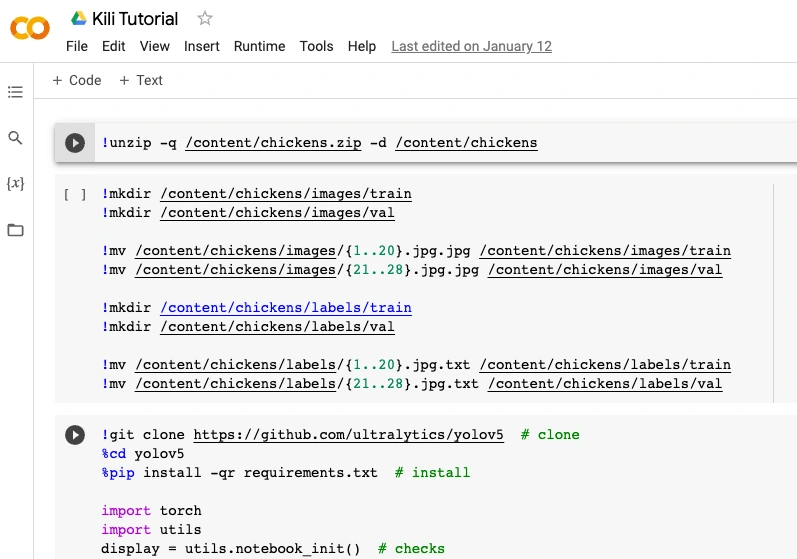
What Is A Notebook Anyway?
Jupyter notebooks are files that contain a mix of regular text and snippets of code written in a programming language. Each part is contained in a “cell” that can be run separately. For example, a “text” cell describes the process of calculating whether or not 2044 will be a leap year, and the “code” cell below contains the actual code that does the calculation and gives you the results. Colab notebooks are Jupyter notebooks that run in the cloud and are highly integrated with Google Drive, making them easy to set up access, and share.
Prepare Your Own Notebook
Copy the notebook to your own Google Drive:

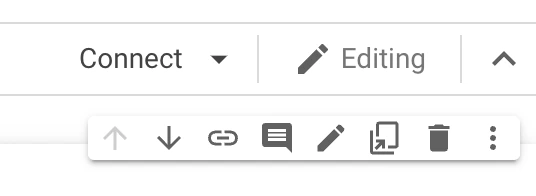
When done, open your new notebook and click Connect in the top-right corner of your screen. You can ignore the high RAM usage warning.
In the notebook, open your content directory:
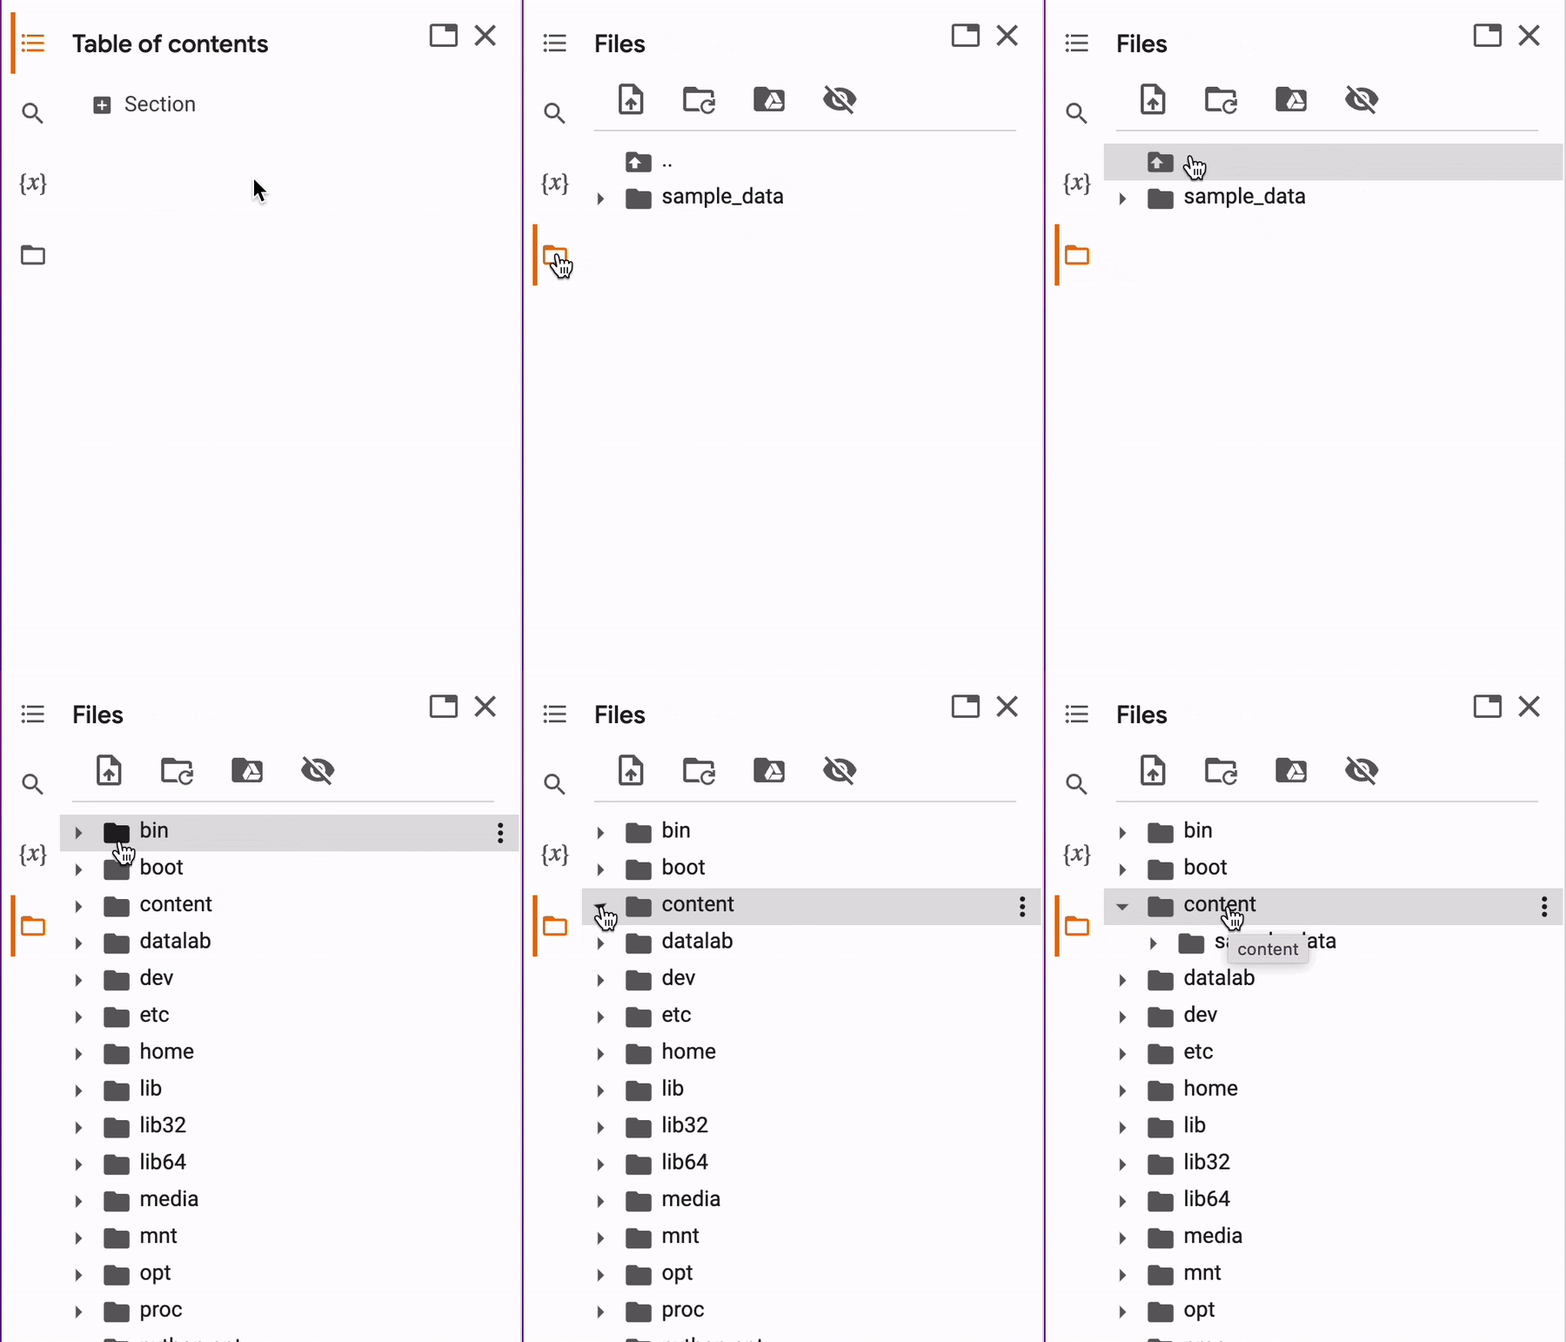
Drag and drop your chickens.zip file to the content directory. Be patient: uploading may take some time. Also: wait for the upload to finish before running any cells.

When done, click the arrow to the left of the cell to run the first cell. You can ignore the high GPU usage warning that sometimes pops up.

A new directory named chickens should appear in your content directory. You may have to hit “Refresh” to see it:
Now let’s edit the directory structure. Run cell #2 to create the proper directory structure to train our model.

This is the directory structure we should get:
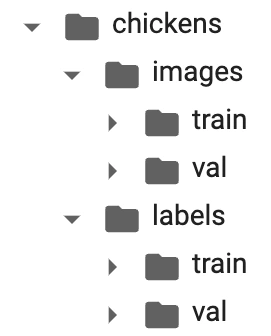
As the next step, run cell #3 to clone the yolov5 repository:

A new directory, yolov5, should have appeared in your content directory. You may have to hit “Refresh” to see it.
What we did now was: we made a copy of a git repository (complete code openly shared on the Internet by the creators of the tool we’ll be using). We’ve also installed the libraries necessary for this code to run properly and imported some of the required modules (both of these are essentially a bunch of code written by others and shared with the general public to be reused).
Now navigate to the coco128.yaml file and double-click to open it.
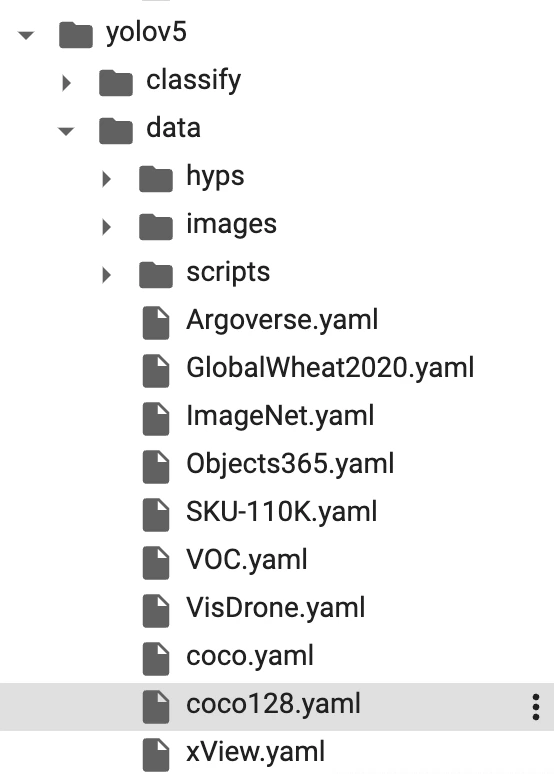
Remove all the current content in the coco128.yaml file and replace with this code:
path: /content/chickens
train: images/train
val: images/val

# Classes
names:
 0: chicken
Then, Run cell #4 to train our model:
!python train.py --img 640 --batch 16 --epochs 100 --data coco128.yaml --weights yolov5s.pt --cacheDepending on your Google collab settings, training will take a few minutes or about an hour. If you haven’t used up your daily GPU quota yet it should be really fast.
When done, check your trained model’s accuracy: The closer to “1”, the better.

Excited yet? We can now check how well our model does on “new” data. To do that, drag and drop the remaining two pictures of chickens from your computer to the content directory and then run cell #5 to process file #29..
!python detect.py weights runs/train/exp/weights/best.pt --img 640 --conf 0.35 --source /content/29.jpgCheck where the results were saved:
…and then navigate to the directory with the saved output.

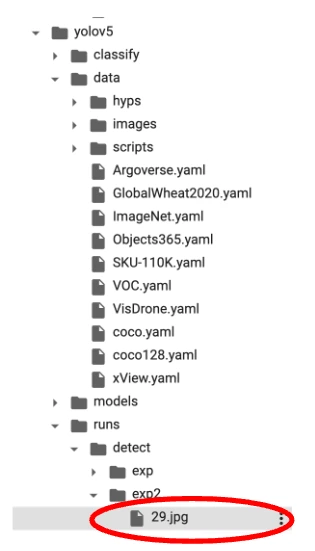
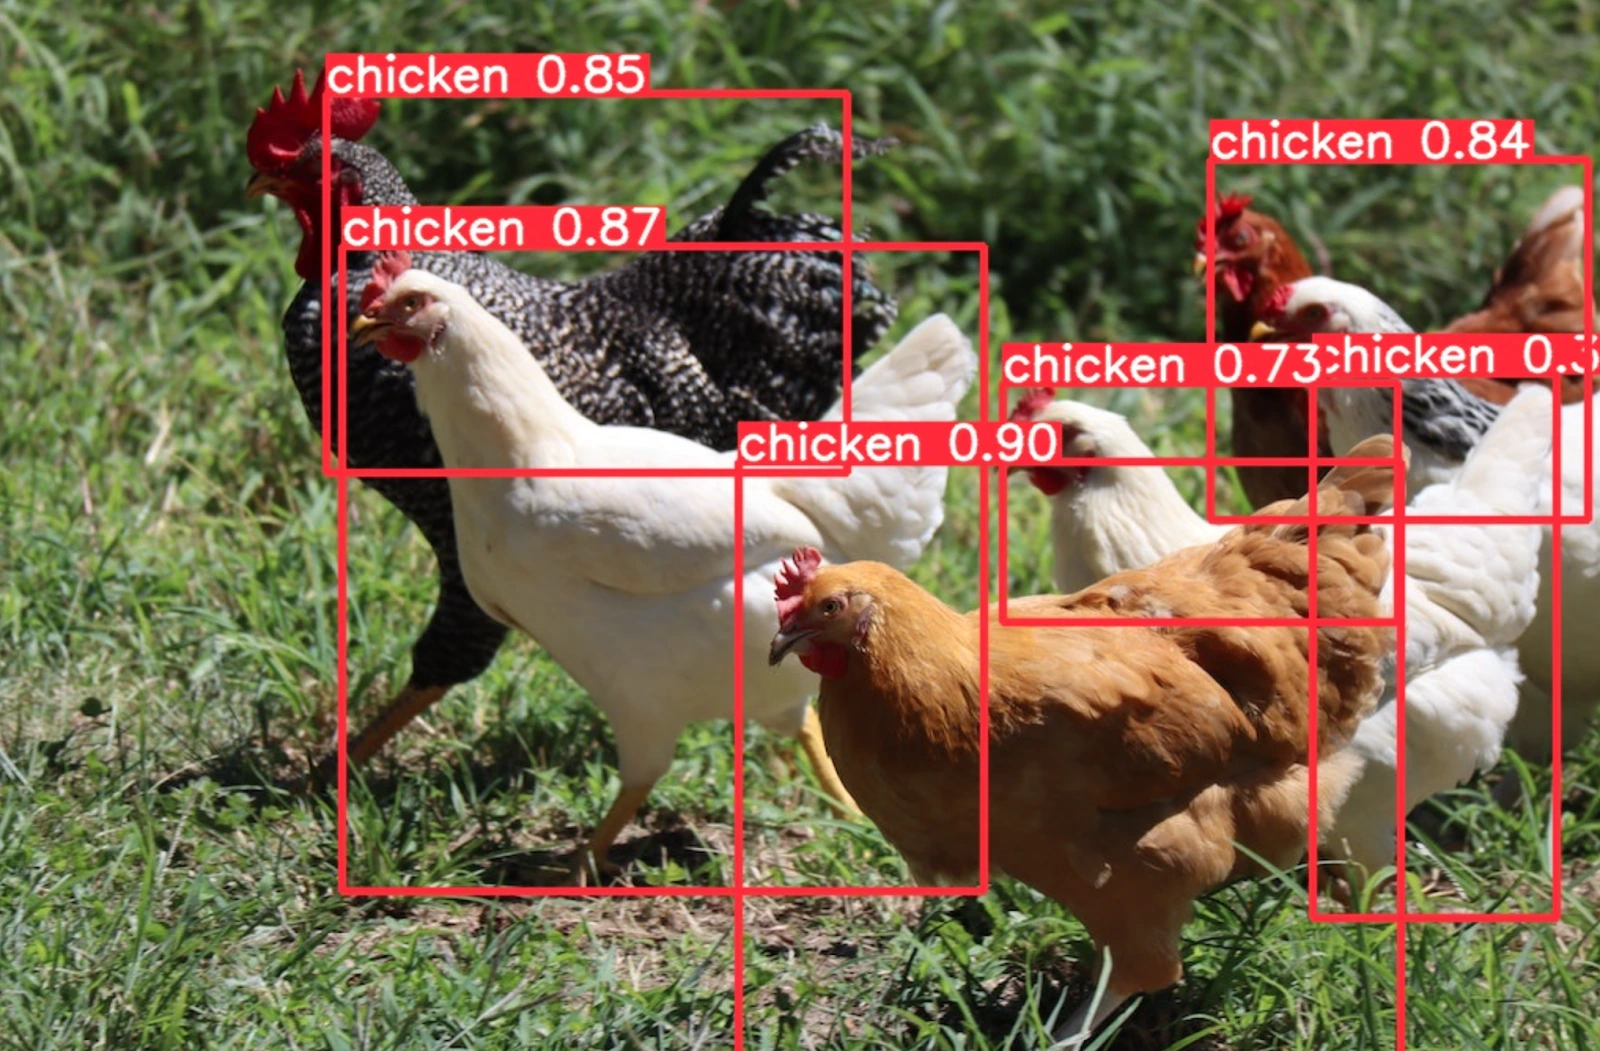
Similarly, to predict what’s in picture #30, edit the contents of cell#4 to use file #30 and then check the results.
As you can see, the model can get pretty good at spotting chickens that it hasn’t seen before. Note that our dataset was really tiny and not super-diverse. Imagine the possibilities when working with really diverse, well-prepared datasets!
Congratulations!
You have successfully created your own Kili Technology project, added and exported labels, taught a machine-learning model to recognize chickens, and then tested the model using completely new data. Good job!
Seems like you're ready to level up your image recognition game and learn how to train your image recognition model efficiently!
Credits
Big thank you to https://www.youtube.com/@DeepLearning004 for inspiration!

.png)
_logo%201.svg)


