.png)


_logo%201.svg)


AI Summary
Introduction
Understanding your users’ needs is crucial in any user-related business. But it also requires a lot of hard work and analysis, which is quite expensive. Why not leverage machine learning then? With much less coding by using Auto ML.
In this article, we will leverage HuggingFace and Kili to build an active learning pipeline for text classification. Active learning is a process in which you add labeled data to the data set and then retrain a model iteratively. Therefore, it is endless and requires humans to label the data.
We will build our pipeline by using user reviews of Medium from the Google Play Store. After that, we are going to categorize the reviews with the pipeline we built. Finally, we will apply sentiment analysis to the classified reviews. Then we will analyze the results, understanding the users’ needs and satisfaction will be much easier.
Why Analyze User Reviews?
Especially when you try to add new features or make changes to a product, it is important to know your customer base. People like to interact with the brand. And this interaction is a very valuable source of insight into the approach you take to develop your product.
When you try to find out if your feature or change works, you’ll want to analyze this interaction. This is already done when users rate your application or when you hand out polls. But most of the time, this is not a clear indicator of what you’re lacking or fine.
Analyzing the feedback of your users or customers is vital, but it is almost impossible to analyze thousands of tweets or reviews by hand. This is why we use machine learning, to ease our burden.
AutoTrain with HuggingFace
Automated machine learning is a term for automating a machine learning pipeline. It also includes data cleaning, model selection, and hyper-parameter optimization too. We can use HuggingFace’s transformers for automated hyper-parameter searching. Hyper-parameter optimization is a really difficult and time-consuming process.
We can build our pipeline by using transformers and other powerful APIs, it is also possible to fully automate our pipeline with AutoTrain. AutoTrain is a framework created by Hugging Face that is built on many powerful APIs like transformers, datasets and inference-api.
Cleaning the data, model selection, and hyper-parameter optimization steps are all fully automated in AutoTrain. One can fully utilize this framework to build production-ready SOTA transformer models for a specific task. Currently, AutoTrain supports binary and multi-label text classification, token classification, extractive question answering, text summarization, and text scoring. It also supports many languages like English, German, French, Spanish, Finnish, Swedish, Hindi, Dutch, and more. If your language is not supported by AutoTrain, it is also possible to use custom models with custom tokenizers.
Kili Technology
Kili Technology is an end-to-end AI training platform for data-centric businesses. Kili Technology provides optimized labeling features and quality management tools to manage your data. You can quickly annotate the image, video, text, pdf, and voice data while controlling the quality of the dataset. It also has powerful APIs for GraphQL and Python which eases data management a lot.
It is available either online or on-premise and it enables modern machine learning technics either on computer vision or on NLP and OCR. It supports text classification, named entity recognition (NER), relation extraction, and more NLP/OCR tasks. It also supports computer vision tasks like object detection, image transcription, video classification, semantic segmentation, and many more!
Kili Technology is a commercial tool but you can also create a free developer account to try Kili Technology’s tools. You can learn more from the pricing page.
Project
We will work on an example of review classification, along with sentiment analysis, to get insights about a mobile application.
I have extracted around 40 thousand reviews of Medium from the Google Play Store. We will annotate the review texts in this dataset step by step. And then we’re going to build a pipeline for review classification. In the modeling, the first model will be prepared with AutoTrain. Then we will also build a model without using AutoTrain.
All the code and the dataset can be found on the GitHub repository of the project.
Dataset
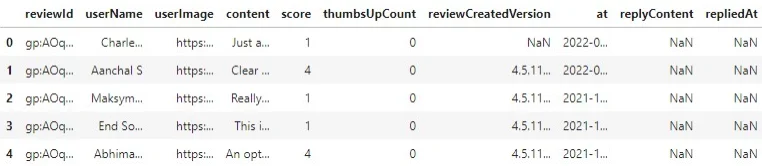
Let’s start by taking a look at the raw dataset,
There are 10 columns and 40130 samples in this dataset. The only column we need is `content` which is the review of the user. Before starting, we need to define some categories.
I have defined 4 categories,
- Subscription: Since medium has a subscription option, anything related to users' opinions about subscription features should belong here.
- Content: Medium is a sharing platform, there are lots of writings from poetry to advanced artificial intelligence research. Users’ opinions about a variety of topics, the quality of the content should belong here.
- Interface: Thoughts about UI, searching articles, recommendation engine, and anything related to the interface should belong here. This also includes payment-related issues.
- User Experience: The user’s general thoughts and opinions about the application. Which should be generally abstract without indicating another category.
For the labeling part, we need to create a project in Kili Technology’s platform at first. We can use either the web interface of the platform or APIs. I’ll show them both.
From the web interface:
From the project list page, I created a multi-class text classification project.
After that, on the project’s page, you can add your data by clicking the Add assets button. Currently, you can add at most 25000 samples, but you can extend this limit if you contact the Kili Technology sales team.
After we create our project, we need to add jobs. We can prepare a labeling interface from the Settings page
I have defined 4 categories but it is inevitable to come across reviews that should have multiple categories or completely weird ones. I will add two more labels (which are not to use in modeling) to catch these cases too.
In our example, I added two more labels (Other, Multi-label). I also added a named entity recognition (NER) job just to specify how I decided on a label while labeling. The final interface is shown below
As you can see from the menu at the left, it is also possible to drop a link that describes your labels on the `Instructions` page. We can also add other members to our project from `Members` or add quality measures from the `Quality management` pages. More information can be found in the documentation.
Now, let’s create our project with Python API:
At first, we need to import needed libraries
(notebooks/kili_project_management.ipynb)
import os
#we will process the data (which is a csv file)import pandas as pd
#API clientfrom kili.client import Kili
#Why not use pretty progress bars?
from tqdm import tqdm
from dotenv import load_dotenvload_dotenv()
In order to access the platform, we need to authenticate our client
API_KEY = os.getenv('KILI_API_KEY')
# initialize and authenticate the Kili client
kili = Kili(api_key = API_KEY)
Now we can start to prepare our interface, the interface is just a dictionary in Python. We will define our jobs, then fill the labels up. Since all labels also could have children labels, we will pass labels as dictionaries too.
labels = ['User experience', 'Subscription', 'Content', 'Other', 'Multi label']
entity_dict = {
    'User experience': '#cc4125',
    'Subscription': '#4543e6',
    'Content': '#3edeb6',
}
project_name = 'User review dataset for topic classification'
project_description = "Medium's app reviews fetched from google play store for topic classification"

interface = {
    'jobs': {
        'JOB_0': {
            'mlTask': 'CLASSIFICATION',
            'instruction': 'Labels',
            'required': 1,
            'content': {
                "categories": {},
                "input": "radio",
            },
        },
        'JOB_1': {
            'mlTask': "NAMED_ENTITIES_RECOGNITION",
            'instruction': 'Entities',
            'required': 1,
            'content': {
                'categories': {},
                "input": "radio"
            },
        },
    }
}

# fill the interface json with jobs
for label in labels:
    # converts labels to uppercase and replaces whitespaces with underscores (_)
    # ex. User experience -> USER_EXPERIENCE
    # this is the preferred way to fill the interface
    label_upper = label.strip().upper().replace(' ', '_')
    #
    content_dict_0 = interface['jobs']['JOB_0']['content']
    categories_0 = content_dict_0['categories']
    category = {'name': label, 'children': []}
    categories_0[label_upper] = category

for label, color in entity_dict.items():
    label_upper = label.strip().upper().replace(' ', '_')
    content_dict_1 = interface['jobs']['JOB_1']['content']
    categories_1 = content_dict_1['categories']
    category = {'name': label, 'children': [], 'color': color}
    categories_1[label_upper] = category

# now we can create our project
# this method returns the created project’s id
project_id = kili.create_project(json_interface=interface,
                            input_type='TEXT',
                            title=project_name,
                            description=project_description)['id']
We are ready to upload our data to the project. I will use the `append_many_to_dataset` method to import the data into the platform. By using the Python API, we can import the data by batch of 100 maximum. I have prepared a simple function to upload the data:
def import_dataframe(project_id:str, dataset:pd.DataFrame, text_data_column:str, external_id_column:str, subset_size:int=100) -> bool:
    """
    Arguments:
    Inputs
        - project_id (str): specifies the project to load the data, this is also returned when we create our project
        - dataset (pandas DataFrame): Dataset that has proper columns for id and text inputs
        - text_data_column (str): specifies which column has the text input data
        - external_id_column (str): specifies which column has the ids
        - subset_size (int): specifies the number of samples to import at a time. Cannot be higher than 100

    Outputs:
        None

    Returns:
        True or False regards to process succession

    """

    assert subset_size <= 100, "Kili only allows to upload 100 assets at most at a time onto the app"


    L = len(dataset)

    # set 25000 as an upload limit, can be changed
    if L>25000:
        print('Kili Projects currently supports maximum 25000 samples as default. Importing first 25000 samples...')
        L=25000

    i = 0

    while i+subset_size < L:

        subset = dataset.iloc[i:i+subset_size]

        externalIds = subset[external_id_column].astype(str).to_list()
        contents = subset[text_data_column].astype(str).to_list()

        kili.append_many_to_dataset(project_id=project_id,
                                    content_array=contents,
                                    external_id_array=externalIds)

        i += subset_size

    return True
It simply imports the given `dataset` DataFrame to a project specified by project_id.
We can see the arguments from docstring, we just need to pass our dataset along with the corresponding column names. I’ll just use the sample indices we get when we load the data. And then voila, uploading the data is done!
dataset_path = '../data/processed/lowercase_cleaned_dataset.csv'
df = pd.read_csv(dataset_path).reset_index() # reset index to get the indices

import_dataframe(project_id, df, 'content', 'index')
It wasn’t difficult to use the Python API, the helper methods we used covered many difficulties. I also used another script to check the new samples when I updated the dataset. Sometimes the model performance drop down after the dataset update. This is due to simple mistakes like mislabeling and introducing bias to the dataset. The script simply authenticates and then moves distinct samples of two given dataset versions to `To Review`. We can change the property of a sample through `update_properties_in_assets` method:
(scripts\move_diff_to_review.py)
import argparse
import os
import pandas as pd
from dotenv import load_dotenv
from kili.client import Kili

# -------------------------
# Load environment variables
# -------------------------
load_dotenv()

# -------------------------
# Argument Parser
# -------------------------
parser = argparse.ArgumentParser(description="Mark differing assets between two datasets as TO_REVIEW in Kili.")
parser.add_argument(
    '--first',
    required=True,
    type=str,
    help='Path to the first dataframe (CSV).'
)
parser.add_argument(
    '--second',
    required=True,
    type=str,
    help='Path to the second dataframe (CSV).'
)
args = vars(parser.parse_args())

# -------------------------
# Kili Authentication
# -------------------------
API_KEY = os.getenv('KILI_API_KEY')
kili = Kili(API_KEY)

# -------------------------
# Load DataFrames
# -------------------------
df1 = pd.read_csv(args['first'])
df2 = pd.read_csv(args['second'])

# -------------------------
# Find Differences Between DataFrames
# -------------------------
# Concatenate both DataFrames; duplicates represent common rows.
# Dropping duplicates with keep=False leaves only differing rows.
diff_df = pd.concat([df1, df2]).drop_duplicates(keep=False)

# Extract IDs of differing assets
diff_ids = diff_df['id'].to_list()

# -------------------------
# Update Kili Assets
# -------------------------
# Kili expects a status for each asset in the update array.
kili.update_properties_in_assets(
    diff_ids,
    status_array=['TO_REVIEW'] * len(diff_ids)
)

# -------------------------
# Summary
# -------------------------
print(f'SET {len(diff_df)} ENTRIES TO BE REVIEWED!')
Learn more!
Discover how training data can make or break your AI projects, and how to implement the Data Centric AI philosophy in your ML projects.
Labeling
When it comes to labeling, the platform has a built-in labeling interface which is pretty easy to use. Available keyboard shortcuts helped while I was annotating the data. I used the interface without breaking a sweat, there are automatically defined shortcuts and it simplifies the labeling. We can see the shortcuts by clicking the keyboard icon at the right-upper part of the interface, they are also shown by underlined characters in the labeling interface at the right.
While labeling, I skipped some samples since I couldn't decide and some samples were very weird. In general, the process was way easier thanks to Kili Technology’s built-in platform.
Exporting the Labeled Data
The labeled data is exported with ease by using Python API. The script below exports the labeled and reviewed samples into a dataframe, then saves it with a given name as a CSV file.
import argparse
import os
import pandas as pd
from dotenv import load_dotenv
from kili.client import Kili

# Load environment variables
load_dotenv()

# -------------------------
# Argument Parser
# -------------------------
parser = argparse.ArgumentParser(description="Fetch labeled dataset from Kili and export as CSV.")
parser.add_argument(
    '--output_name',
    required=True,
    type=str,
    default='dataset.csv',
    help='Name of the output CSV file.'
)
parser.add_argument(
    '--remove',
    required=False,
    type=str,
    help='Optional label to remove from the dataset.'
)
args = vars(parser.parse_args())

# -------------------------
# Constants and Paths
# -------------------------
API_KEY = os.getenv('KILI_API_KEY')
dataset_path = '../data/processed/lowercase_cleaned_dataset.csv'
output_path = os.path.join('../data/processed', args['output_name'])

# -------------------------
# Helper Functions
# -------------------------
def extract_labels(labels_dict):
    """Extract the latest label from a labels dictionary."""
    response = labels_dict[-1]  # Pick the latest version of the sample
    label_job_dict = response['jsonResponse']['JOB_0']
    categories = label_job_dict['categories']
    label = categories[0]['name']
    return label

# -------------------------
# Kili Authentication
# -------------------------
kili = Kili(API_KEY)
print('Authenticated!')

# -------------------------
# Project Retrieval
# -------------------------
project = kili.projects(
    search_query='User review dataset for topic classification'
)[0]
project_id = project['id']

# Fields to fetch from Kili
returned_fields = ['id', 'externalId', 'labels.jsonResponse', 'skipped', 'status']

# Load the original dataset to map externalId to text content
dataset = pd.read_csv(dataset_path)

# -------------------------
# Fetching Data from Kili
# -------------------------
df = kili.assets(
    project_id=project_id,
    status_in=['LABELED', 'REVIEWED'],
    fields=returned_fields,
    format=
Modeling
I took an active learning based approach. I labeled the dataset while also actively fine-tuning a model, I tried to label around 50 samples per dataset version (it was much lower for the first versions). The number of samples is shown below:
Let’s try out the AutoTrain first:
First, open the AutoTrain
- Create a project
- Upload the dataset and choose the split type, I’ll leave it as Auto.
- Train the models
AutoTrain will try different models and select the best models. Then performs hyper-parameter optimization automatically. The dataset is also processed automatically.
The price totally depends on your use case. It can be as low as $10 or it can be more expensive than the current value.
The training is done after around 20 minutes, the results are pretty good!
The best model’s accuracy is almost %89.
Now we can use this model to perform the analysis, it only took about 30 minutes to set up the whole thing.
Modeling without AutoTrain
We will use Ray Tune and Hugging Face’s Trainer API to search hyper-parameters and fine-tune a pre-trained deep learning model. I have selected roBERTa base sentiment classification model which is trained on tweets for fine-tuning. I’ve fine-tuned the model on google collaboratory and it can be found on the `notebooks` folder in the GitHub repository.
Ray tune is a popular library for hyper-parameter optimization which comes with many SOTA algorithms out of the box. It is also possible to use Optuna and SigOpt.
I have used Async Successive Halving Algorithm (ASHA) as the scheduler and HyperOpt as the search algorithm. Which is pretty much a starting point. You can use different schedulers and search algorithms.
What will we do?
- Import the necessary libraries (a dozen of them) and prepare a dataset class
- Define needed functions and methods to process the data
- Load the pre-trained model and tokenizer
- Run hyper-parameter search
- Use the best results for evaluation
Let’s start with importing necessary libraries!
(all the code is in notebooks/modeling.ipynb and google collaboratory notebook)
# -------------------------------------
# General Data Science / Utilization / Visualization Imports
# -------------------------------------
import json
import os
import random

# Progress bar
from tqdm import tqdm

# Data manipulation / reading
import numpy as np
import pandas as pd

# Visualization
import plotly.express as px
import matplotlib.pyplot as plt

# -------------------------------------
# Pre-defined Evaluation Metrics
# -------------------------------------
from sklearn.metrics import (
    accuracy_score,
    f1_score,
    precision_score,
    recall_score
)
from sklearn.model_selection import train_test_split

# -------------------------------------
# Torch Imports
# -------------------------------------
import torch
import torch.nn as nn
from torch.utils.data import DataLoader, Dataset, random_split

# -------------------------------------
# Hugging Face Imports
# -------------------------------------
import transformers
from datasets import load_metric
from transformers import (
    AutoModelForSequenceClassification,
    AutoTokenizer,
    Trainer,
    TrainingArguments
)

# -------------------------------------
# Ray Tune Imports for Hyperparameter Optimization
# -------------------------------------
from ray.tune.schedulers import ASHAScheduler, PopulationBasedTraining
from ray.tune.suggest.hyperopt import HyperOptSearch
Now let’s define our dataset class!
# -------------------------------------
# Custom Dataset Class
# -------------------------------------
class TextClassificationDataset(Dataset):
    def __init__(self, dataframe):
        self.labels = dataframe.label.to_list()
        self.inputs = dataframe.content.to_list()
        self.labels_to_idx = {k: v for k, v in labels_dict.items()}  # Copy labels_dict

    def __len__(self):
        return len(self.inputs)

    def __getitem__(self, idx):
        if isinstance(idx, torch.Tensor):
            idx = list(idx)

        input_data = self.inputs[idx]
        target = self.labels[idx]
        target = self.labels_to_idx[target]

        return {'text': input_data, 'label': target}
We can download the model easily by specifying HuggingFace hub repository. It is also needed to import the tokenizer for the specified model. We have to provide a function to initialize the model during hyper-parameter optimization. The model will be defined there.
The metric to optimize is accuracy, we want this value to be as high as possible. Because of that, we need to load the metric, then define a function to get the predictions and calculate the preferred metric.
# -------------------------------------
# Model & Tokenizer Setup
# -------------------------------------
model_name = 'cardiffnlp/twitter-roberta-base-sentiment'

# Load the accuracy metric
metric = load_metric("accuracy")

# Load the tokenizer for the specified model
tokenizer = AutoTokenizer.from_pretrained(model_name)


# -------------------------------------
# Model Initialization Function
# -------------------------------------
def model_init():
    """
    Hyperparameter optimization is performed by newly initialized models.
    Therefore, we need to initialize the model again for every single search run.

    This function initializes and returns the pre-trained model selected with `model_name`.
    """
    return AutoModelForSequenceClassification.from_pretrained(
        model_name,
        num_labels=4,
        return_dict=True,
        ignore_mismatched_sizes=True
    )


# -------------------------------------
# Evaluation Metric Computation
# -------------------------------------
def compute_metrics(eval_pred):
    logits, labels = eval_pred
    # Pick the index with the highest value as the prediction
    predictions = np.argmax(logits, axis=-1)
    return metric.compute(predictions=predictions, references=labels)
After defining metric calculation and model initialization function, we can load the data:
# -------------------------------------
# Load Dataset
# -------------------------------------
file_name = "dataset-11.csv"
dataset_path = os.path.join('data/processed', file_name)
dataset = pd.read_csv(dataset_path)

# -------------------------------------
# Label ↔ Index Mappings
# -------------------------------------
idx_to_label = dict(enumerate(dataset.label.unique()))
labels_dict = {v: k for k, v in idx_to_label.items()}

# -------------------------------------
# Hyperparameter Search Configuration
# -------------------------------------
scheduler = ASHAScheduler(
    metric='objective',
    mode='max'
)

search_algorithm = HyperOptSearch(
    metric='objective',
    mode='max',
    random_state_seed=SEED
)

# Number of runs for parameter search
n_trials = 40
We also need to tokenize the text data before passing it to the model, we can easily do this by using the loaded tokenizer. Ray Tune works in a black-box setting so I used tokenizer as a default argument for a work-around. Otherwise, an error about tokenizer definition would arise.
def tokenize(sample, tokenizer=tokenizer):
    """
    Tokenize a text sample using the provided tokenizer.

    Args:
        sample (dict): A dictionary containing 'text' and 'label' keys.
        tokenizer (transformers.PreTrainedTokenizer): The tokenizer to use.

    Returns:
        dict: A tokenized sample with input IDs, attention masks, and label.
    """
    tokenized_sample = tokenizer(
        sample['text'],
        padding=True,
        truncation=True
    )
    tokenized_sample['label'] = sample['label']
    return tokenized_sample
Another utility function that returns stratified and tokenized Torch dataset splits:
def prepare_datasets(dataset_df, test_size=0.2, val_size=0.2):
    """
    Split the dataset into train, validation, and test sets,
    shuffle them, convert to PyTorch datasets, and tokenize.

    Args:
        dataset_df (pd.DataFrame): The full dataset as a DataFrame.
        test_size (float): Proportion of the dataset to include in the test split.
        val_size (float): Proportion of the training set to include in the validation split.

    Returns:
        tuple: (tokenized_train_set, tokenized_val_set, tokenized_test_set)
    """
    # -------------------------------------
    # Split the dataset
    # -------------------------------------
    train_set, test_set = train_test_split(
        dataset_df,
        test_size=test_size,
        stratify=dataset_df.label,
        random_state=SEED
    )

    train_set, val_set = train_test_split(
        train_set,
        test_size=val_size,
        stratify=train_set.label,
        random_state=SEED
    )

    # -------------------------------------
    # Shuffle the splits
    # -------------------------------------
    train_set = train_set.sample(frac=1, random_state=SEED)
    val_set = val_set.sample(frac=1, random_state=SEED)
    test_set = test_set.sample(frac=1, random_state=SEED)

    # -------------------------------------
    # Convert DataFrames to Datasets
    # -------------------------------------
    train_dataset = TextClassificationDataset(train_set)
    val_dataset = TextClassificationDataset(val_set)
    test_dataset = TextClassificationDataset(test_set)

    # -------------------------------------
    # Tokenize the datasets
    # -------------------------------------
    tokenized_train_set = train_dataset.map(tokenize)
    tokenized_val_set = val_dataset.map(tokenize)
    tokenized_test_set = test_dataset.map(tokenize)

    # -------------------------------------
    # Return processed datasets
    # -------------------------------------
    return tokenized_train_set, tokenized_val_set, tokenized_test_set
Now we can perform the search! Let’s start by processing the data:
# -------------------------------------
# Prepare Tokenized Datasets
# -------------------------------------
tokenized_train_set, tokenized_val_set, tokenized_test_set = prepare_datasets(dataset)

# -------------------------------------
# Training Arguments
# -------------------------------------
training_args = TrainingArguments(
    output_dir='trial_results',
    evaluation_strategy="steps",
    disable_tqdm=True,
    skip_memory_metrics=True,
)

# -------------------------------------
# Trainer Setup
# -------------------------------------
trainer = Trainer(
    args=training_args,
    tokenizer=tokenizer,
    train_dataset=tokenized_train_set,
    eval_dataset=tokenized_val_set,
    model_init=model_init,
    compute_metrics=compute_metrics
)

# -------------------------------------
# Hyperparameter Search
# -------------------------------------
best_run = trainer.hyperparameter_search(
    direction="maximize",
    n_trials=n_trials,
    backend="ray",
    search_alg=search_algorithm,
    scheduler=scheduler
)
I performed the search with 20 and 40 trials respectively, the results are shown below. The weighted average of F1, Recall, and Precision scores for 20 runs.
The weighted average of F1, Recall, and Precision scores for 40 runs.
The performance spiked up at the third dataset version. At some point in data labeling, I’ve introduced too much bias to the dataset mistakingly. As we can see its performance becomes more reasonable since the sample variance increased later on. The final model is saved at Google Drive and can be downloaded from here, it is also possible to download via the `download_models.py` script.
Final Analysis
We can use the fine-tuned model to conduct the final analysis now. All we have to do is load the data, process it, and get the prediction results from the model. Then we can use a pre-trained model for sentiment analysis and hopefully get insights.
I’ve used google collaboratory for the inference (here) and then exported the results to `result.csv`. It can be found in `results` in the GitHub repository. I analyzed the results in another google collaboratory notebook for an interactive experience. So you can also use it easily and interactively.
Let’s check the results now!
We can see that the given scores are highly positive. In general, the application is liked by the users.
This also matches with the sentiment analysis, most of the reviews are positive and the least amount of reviews are classified as negative.
As we can see from above, the model's performance is kind of understandable. Positive scores are dominantly higher than the others, just like the sentimental analysis graph shows.
As it comes to the categories I've defined before, it seems that the model predicts most of the reviews are about users' experiences (excluding experiences related to other categories):
We can also see the sentiment predictions over defined categories below:
We won't do a detailed analysis of the reviews, a basic understanding of potential problems would suffice. Therefore, it is enough to conclude simple results from the final data:
- It is understandable that most of the reviews about the subscription are negative. Paid content generally is not welcomed in mobile applications.
- There are many negative reviews about the interface. This may be a clue for further analysis. Maybe there is a misconception about features, or a feature doesn't work as users thought.
- People have generally liked the articles and most of them had good experiences.
Important note about the plot: we haven't filtered the reviews by application version. When we look at the results of the latest current version (4.5), it seems that the interface of the application confuses the users or has annoying bugs.
Conclusion
Now we can use the pre-trained model to try to understand the potential shortcomings of the application. Then it would be easier to analyze a specific feature.
We used HuggingFace’s powerful APIs and AutoTrain along with Kili Technology’s easy-to-use interface in this example. The modeling with AutoTrain just took 30 minutes, it chose the models and trained them for our use. AutoTrain is definitely much more efficient since I spent more time as I develop the model by myself.
All the code, datasets, and scripts can be found in github. You can also try the AutoTrain model.
While we can consider this as a valid starting point, we should collect more data and try to build better pipelines. Better pipelines would result in more efficient improvements.
![Best On-Premise Data Labeling Platforms for Regulated Industries [2026] Guide](https://cdn.prod.website-files.com/68da32b2041c593b0511a582/6a574849a90d08dc8b9b547d_Competitor%20Article%20-%20Listicle%201%20(2).webp)