.png)


_logo%201.svg)


AI Summary
Computer vision is a fast-evolving field focused on helping computers understand images and videos like humans do. It involves developing algorithms and systems that can analyze these visuals and extract useful information from them. One key area within computer vision is object detection. It revolves around identifying specific objects, like people, vehicles, or animals, in images or video frames based on predefined classes.
In this tutorial, we will embark on a journey to explore the intricacies of YOLOv7 (You Only Look Once Version 7), one of the latest and most advanced iterations in the YOLO family, renowned for its real-time object detection capabilities.
We'll begin by providing an in-depth understanding of YOLOv7's architecture, its innovative features such as anchor boxes and focal loss, and a comparative analysis with other YOLO versions. Armed with this knowledge, we will guide you through the process of effectively utilizing Kili, a robust data labeling and management platform, to seamlessly prepare your data for YOLOv7 training.
Throughout this tutorial, you'll gain hands-on experience in exporting data to the YOLOv7 format, training your own object detection model, and importing predictions back into Kili. Whether you're a seasoned practitioner in computer vision or just starting your journey, our step-by-step approach ensures that you'll be well-equipped to create state-of-the-art object detection systems, saving time and overcoming challenges along the way.
What is object detection?
As a reminder, object detection is a computer vision technique used to identify and locate objects in images or videos. It plays a vital role in advanced computer vision systems like self-driving cars, security systems, and medical imaging.
To detect objects, models extract features from input images or videos and use them to train machine learning models. These models classify objects and predict their locations. Once trained, they can detect objects in new images and videos.
There are two main types of object detection algorithms: one-stage and two-stage.
One-stage algorithms like YOLO and SSD divide the input image into a grid of cells. For each cell, they predict the probability of object classes and bounding box positions.
Two-stage algorithms like Faster R-CNN and Mask R-CNN generate region proposals and then classify and predict bounding boxes for each proposal. While one-stage algorithms are faster, two-stage algorithms offer higher accuracy.
What is YOLO v7, and how does it work?
YOLOv7 is one of the most recent stable iterations of the YOLO algorithm, introduces a range of enhancements compared to its predecessors. Notably, one of its key advancements is the integration of anchor boxes. These anchor boxes, available in various aspect ratios, play a pivotal role in identifying objects with diverse shapes. YOLOv7 employs a set of nine anchor boxes, expanding its capability to detect objects of varying sizes and shapes, resulting in a reduction of false positives. Additionally, YOLOv7 incorporates a novel loss function called "focal loss" to elevate its performance. Unlike the conventional cross-entropy loss function utilized in earlier YOLO versions, focal loss specifically addresses the challenge of detecting small objects.
Now, let's delve into a more comprehensive understanding of YOLOv7, its operational principles, and the historical context of the YOLO algorithm.
1. How it Works
YOLO, operates by employing an advanced neural network architecture to perform the task of object detection within images. One of its key innovations is its ability to predict bounding boxes that precisely enclose objects of interest along with associated class probabilities, all in a single pass. This approach distinguishes YOLOv7 from traditional two-stage object detection methods, which involve separate region proposal and classification stages.
The architecture of YOLOv7 is thoughtfully designed for efficiency and accuracy. It incorporates anchor boxes, a crucial feature that aids in the localization of objects within an image. These anchor boxes come in various sizes and aspect ratios, allowing YOLOv7 to adapt to objects of different shapes and sizes. This multi-scale detection strategy contributes significantly to its robust performance.
In addition to anchor boxes, YOLOv7 introduces the use of a specialized loss function known as 'focal loss.' This loss function addresses a common challenge in object detection: accurately identifying and localizing small objects. By adjusting the weight of the loss on well-classified examples and placing more emphasis on challenging examples, focal loss improves the model's ability to detect smaller objects effectively.
These innovative architectural elements collectively make YOLOv7 not only faster but also more accurate than its predecessors. This enhanced performance extends its applicability across a wide range of computer vision applications, including but not limited to autonomous vehicles, surveillance systems, medical imaging, and retail inventory management, where real-time and precise object detection is paramount for success
2. History of YOLO
The evolution of the YOLO (You Only Look Once) algorithm has played a pivotal role in real-time object detection. YOLOv1, introduced in 2016 by Joseph Redmon, revolutionized object detection by framing it as a regression problem, enabling simultaneous prediction of bounding boxes and class probabilities, making it ideal for real-time applications. Subsequently, YOLOv2, or YOLO9000, expanded YOLO's capabilities by hierarchically classifying over 9,000 object categories. This significant expansion made YOLO more versatile and applicable across diverse domains.
YOLOv3 further refined the model by introducing a feature pyramid network (FPN) and multi-scale detection, improving object detection across various sizes and scales. With the incorporation of more anchor boxes, it achieved better localization and detection performance.
YOLOv4, a milestone version, pushed the boundaries of speed and accuracy. It introduced features like CSPDarknet53, PANet, and SAM block, significantly enhancing object detection performance while maintaining real-time capabilities.
The latest iteration, YOLOv7, builds upon this legacy by addressing challenges and fine-tuning the model for increased accuracy and efficiency. The history of the YOLO algorithm showcases its continuous impact on computer vision research and its role in advancing real-time object detection capabilities.
To access more detailed information about different YOLO versions, please refer to our comprehensive guide available at this link.
Applications of YOLOv7
The advancements introduced in YOLOv7 have unlocked a wide array of practical applications across various industries, revolutionizing the way we interact with technology and data. Here are some notable applications:
- Autonomous Vehicles:YOLOv7's real-time object detection capabilities are a game-changer for autonomous vehicles. It enables these vehicles to perceive their surroundings accurately, identify obstacles, pedestrians, and other vehicles, and make split-second decisions for safe navigation. This application holds the promise of safer and more efficient transportation systems.
- Surveillance Systems:In the realm of security and surveillance, YOLOv7's advanced object detection is invaluable. It enhances the effectiveness of surveillance cameras by swiftly identifying and tracking objects or individuals of interest, significantly improving security measures and threat detection.
- Healthcare and Medical Imaging:YOLOv7 plays a crucial role in the healthcare industry by facilitating the rapid and precise identification of anomalies within medical images, including X-rays, MRIs, and CT scans. Its high accuracy and speed aid medical professionals in diagnosing conditions, potentially leading to faster treatments and improved patient outcomes.
- Retail and Inventory Management:Within the retail sector, YOLOv7 streamlines inventory management. It can accurately track products on store shelves, manage stock levels, and even analyze customer behavior for better marketing strategies. This results in improved customer experiences and increased operational efficiency.
These are just a few examples of how YOLOv7's versatility, speed, and accuracy continue to push the boundaries of computer vision applications, transforming industries and contributing to a smarter and safer world. The model's ability to adapt and excel in a wide range of contexts demonstrates its significance in the field of artificial intelligence and machine learning.
YOLOv7 performance compared to other models
YOLOv7 introduces a more streamlined architecture, making it easier to train and deploy. This simplicity doesn't compromise performance but, in fact, enhances it by reducing resource overhead.
In comparative benchmark tests, YOLOv7 consistently showcases its prowess, standing tall among other object detection models. Its combination of speed, accuracy, and adaptability makes it an appealing choice for developers and researchers across diverse fields, driving innovation and advancements in computer vision applications. As the field continues to evolve, YOLOv7 remains at the forefront, setting a high bar for real-time object detection performance.
The ensuing image provides a visual representation of the performance comparison between YOLOv7 and its precursor versions within the YOLO family [Source].

Working with YOLO v7
To be able to train a model using YOLO v7, you have to create a data.yaml file that indicates the image and label data layout and the classes that you want to detect. You also have to organize your data accordingly. Kili CLI will help you bootstrap this step and does not require a project-specific setup.
The YOLO v7 data.yaml file
Here is an example of YOLO v7 data.yaml file from the repository (example: the COCO 2017 dataset).
# COCO 2017 dataset http://cocodataset.org

# download command/URL (optional)
download: bash ./scripts/get_coco.sh

# train and val data as 1) directory: path/images/, 2) file: path/images.txt, or 3) list: [path1/images/, path2/images/]
train: ./coco/train2017.txt  # 118287 images
val: ./coco/val2017.txt  # 5000 images
test: ./coco/test-dev2017.txt  # 20288 of 40670 images, submit to https://competitions.codalab.org/competitions/20794

# number of classes
nc: 80

# class names
names: [ 'person', 'bicycle’, …]
Enter the Kili CLI
Let’s go through the steps of creating a .yaml file so you can use the Kili data to train a YOLO v7 project.
You can integrate the following steps into a kili_to_yolov7.sh file, or play along with this Colab notebook.
Shape the Kili data
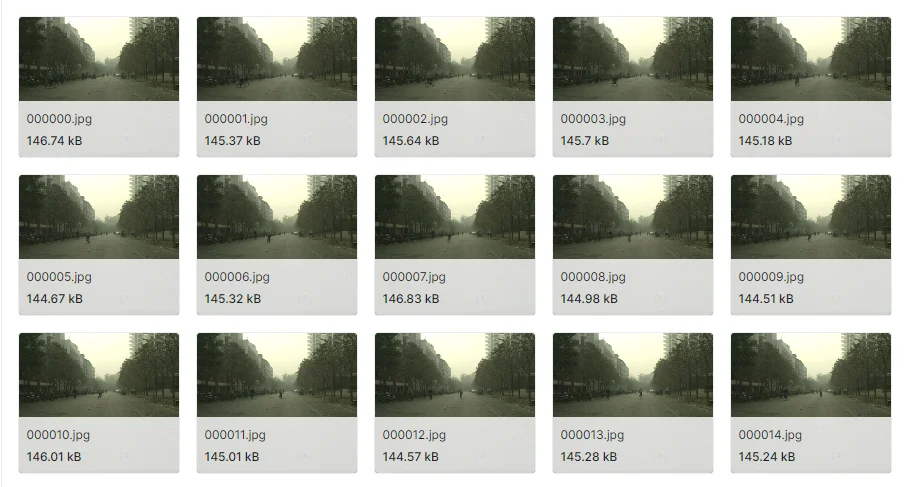
Let’s suppose that you have an object detection project in Kili. For example, we loaded these images from the cyclist Kaggle dataset:
Make sure that you set up:
- The
KILI_PROJECT_IDenvironment variable (the ID of a Kili project that contains your object detection job). You will use this job’s annotations to train a YOLO v7 object detector. - The
KILI_API_KEYenvironment variable that contains the API key of your Kili account.
Once done, you are ready to go!
First, export the annotations with the following command:
kili project export  --project-id $KILI_PROJECT_ID --verbose --output-format
yolo_v7 --output-file your_export.zip
Then unzip the files:
mkdir my_dataset/
unzip -q your_export.zip -d my_dataset/
This will create a dataset folder with the following subfolders:
my_dataset

├── README.kili.txt

├── data.yaml

├── images

└── labels
It is now time to create train, validation, and test datasets that are needed to make yolo_v7 happy, with a random strategy (50% train, 30% val, 20% test). The following command randomly dispatches each asset path into one file among train.txt, test.txt, and val.txt.
find `pwd`/my_dataset/images -name "*.jpg" | awk '{v=rand();if(v<0.5) {print >
"train.txt"} else if (v>0.8) {print > "test.txt"} else {print > "val.txt"}}'
And finally, you can add the dataset files to the data.yaml file created:
echo "train: /path/to/my_dataset/train.txt" >> /path/to/my_dataset/data.yaml
echo "val: /path/to/my_dataset/val.txt" >> /path/to/my_dataset/data.yaml
echo "test: /path/to/my_dataset/test.txt" >> /path/to/my_dataset/data.yaml
In the end, your data.yaml should look like this:
names: ['BICYCLE']

train: /path/to/my_dataset/train.txt

val: /path/to/my_dataset/val.txt

test: /path/to/my_dataset/test.txt
Training a YOLO v7 model
To use YOLO v7, you first need to install the YOLO v7 repository following these instructions, and make sure to download the initial model weights with:
wget https://github.com/WongKinYiu/yolov7/releases/download/v0.1/yolov7.ptWe are now ready to use Yolov7! First, you can run Yolo V7 training using:
python train.py --workers 8 --batch-size 16 --data /path/to/your/data.yaml --img 320 320 --cfg cfg/training/yolov7-tiny.yaml --weights yolov7.pt --name yolov7 --hyp data/hyp.scratch.tiny.yamlImporting predictions back into Kili
Once done, you can import the predictions back into Kili. This can help you diagnose labeling or model errors or serve as a source of pre-annotations.
First, run the YOLO v7 detection using the model you generated in the previous step:
python detect.py --weights path/to/the/trained/model/best.pt --conf 0.25 --img-size 640 --source /content/my_dataset/labels/ --save-txt --project path/where/to/store/labelsThen import the results into Kili. You need to specify a model name of your choice to be able to identify the predictions, and the target job in your original project ontology (here, JOB_0).
kili project label path/where/to/store/labels/exp/labels/ --project-id $KILI_PROJECT_ID --prediction --model-name my-YOLO-v7 --metadata-file my_dataset/data.yaml --target-job JOB_0 --input-format yolo_v7 --api-key=$KILI_API_KEYNow you can visualize the predictions in the Kili interface!
Note that you can also specify the project id of another project, provided that it has the same ontology as the original project. This way, you can use the model-generated annotations to bootstrap human annotations. A human annotator must only validate or correct the model’s predictions. If these predictions are accurate enough, the ratio validation/correction will be high, saving you much annotation time.
Using Kili Technology and Yolo v7: Conclusion
With the steps laid out in this tutorial, you can easily export your project data to the YOLO v7 format, train a model with YOLO v7, and import predictions back into Kili. No more headaches trying to diagnose labeling or model errors – with this approach, you can nip them in the bud and save time. Plus, if you're feeling adventurous, you can switch things up and try YOLO v4 or v5 – just remember to change the label format in Kili import and export!
Frequently Asked Questions
How do I export my project data to the YOLOv7 format in Kili?
You need to set up the KILI_PROJECT_ID and KILI_API_KEY environment variables. After this, you can use the 'kili project export' command to export the annotations.
How do I divide my dataset into train, validation, and test datasets?
The 'find command' can be used to divide your dataset with a random strategy (50% train, 30% validation, 20% test).
How do I install YOLOv7?
You can install YOLOv7 by following the instructions on the YOLOv7 repository. Also, remember to download the initial model weights.
How do I train a YOLO v7 model?
You can train a YOLO v7 model by running the 'python train.py' command with the specified parameters.
How do I import predictions back into Kili?
Importing predictions back into Kili involves running the YOLOv7 detection using the model you generated and then using the 'kili project label' command to import the results into Kili.
Can I use YOLOv4 or YOLOv5 with Kili Technology?
Yes, you can use YOLOv4 or YOLOv5 with Kili Technology. You will simply need to adjust the label format in Kili's import and export processes to align with your chosen YOLO version.